Drought!

According to Drought.gov, as of August 14, our portion of Missouri is in an “exceptional” drought or “D4”. That is as high as the scale goes. As of the end of July, our recorded rainfall was 13.4 inches below our yearly average. There is a lot of praying for rain going on here. I heard a few weeks ago, that a county official was calling area churches asking the congregations to pray for rain. It’s that serious. The Lord has been answering those prayers, because we have had some rain, and yesterday we had a nice slow drizzle. We still have a long way to go though.

This creek is up the road from our house.  I took this picture a couple weeks ago. As you can see it is dry.

0718180828_Burst01

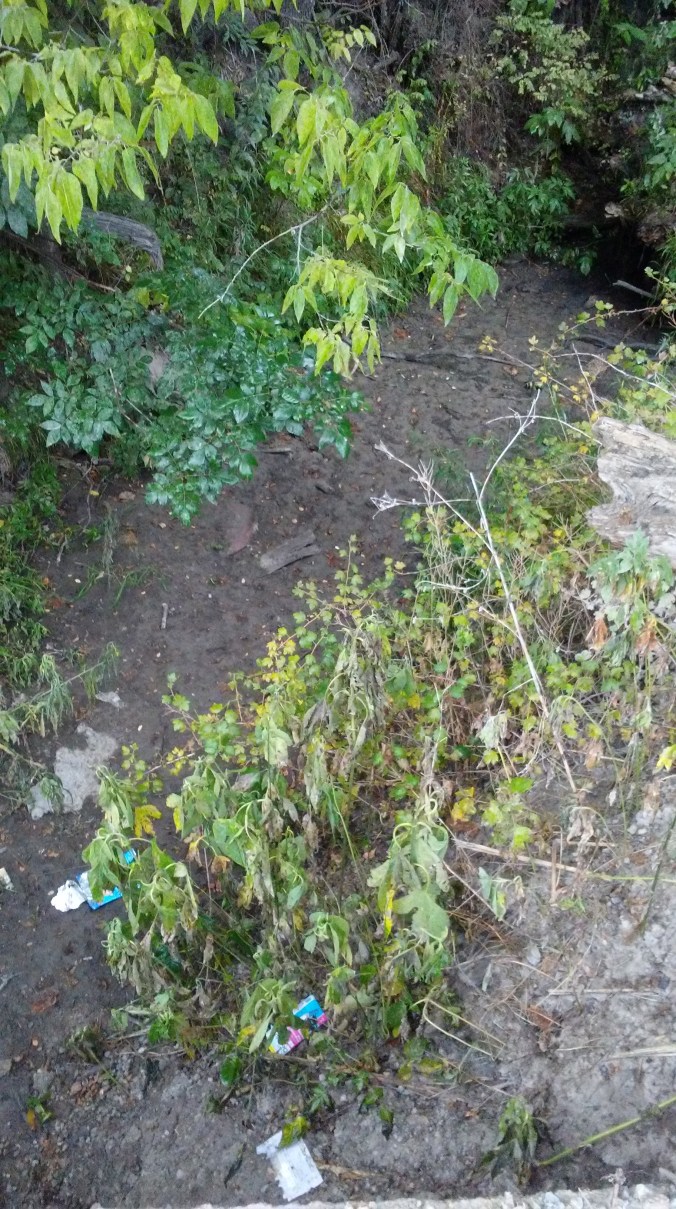
nothing but mud and trash

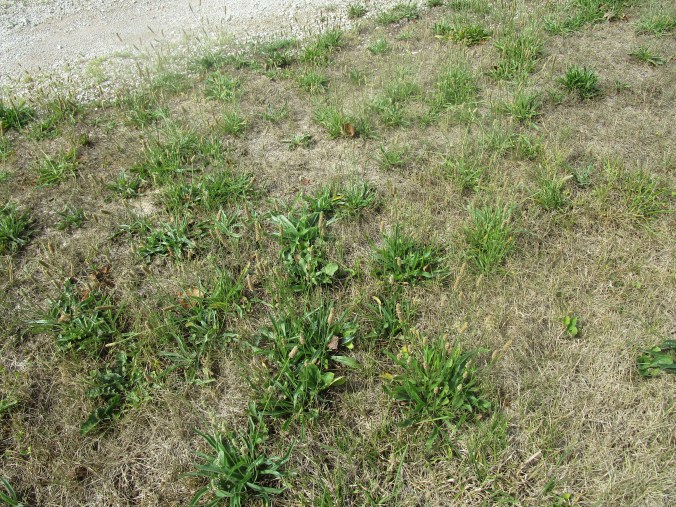
This picture was taken yesterday. There is a little water in it, but it is still low. Just past the other end of our road, the same creek crosses under the road again. That end is damp, but there is no standing water.
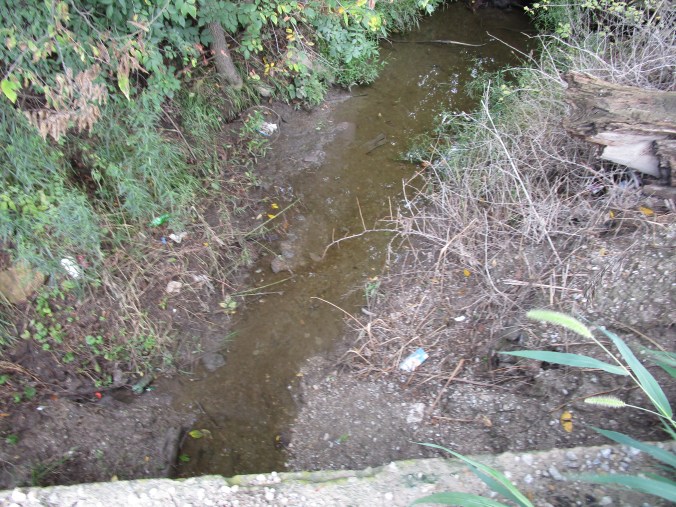
IMG_0700

a little better

So what does a homesteader do during a drought? First we pray for rain. Second, we need to have back up plans for water. We haven’t done too well in that department. In some ways, we did better with it at the place we rented before we bought this place. The house in Independence literally sat on a rock. It was on the side of a cliff, and the dirt was only a few inches deep. There was no city water hookup and no well, so water was brought in and kept in a cistern. One load of water usually lasted about a week, as long as we were careful, and we were very careful, watching the water levels in the cistern closely. I think it only went dry on us one time in the four years we lived there. Running out of water completely was bad on two fronts. One, the obvious one, we were out of water. Two, turning on the pump, which is what happens when you turn on a faucet or flush a toilet, when there is no water, can burn up your pump. Then you have a really big problem. Anyway, we were careful.

So, when we decided we wanted a garden, we had to build box gardens, because there was no soil to speak of. Then, in order to keep it watered, we built a rain barrel to catch rain water. Of course, those years, we had rain. It worked beautifully. I only remember carrying water from the house two or three times.

Ed and raised beds

Ed and our box gardens at the house in Independence

Ed and rain barrel

Ed with our blue rain barrel. Notice the jugs on the ground underneath the barrel. Those are old kitty litter containers that we used to carry water from the barrel to the garden.

When we were considering buying this place, we were both excited to learn that, yes, the house was on city water, but there was also a well that was used to water stock. Awesome right? Well, yes, there is a well. I’ve showed you pictures of it before. It’s an old, open, stacked stone well, that has a pump running down into it. However, it looks like someone tried to fill it in, and all the wiring to the pump has been stripped.

These pictures were taken right after we moved in.

The well and pump

The well on the left and some part of the pump system on the right.

pump

As you can see, all the wiring has been damaged. When we first saw it, it was full of yellow jackets!

down the well

Looking down the well. You can see the water past all limbs, etc.

These pictures were taken this morning.

IMG_0714

Yes, it’s in there somewhere.

IMG_0717

Looking in. Ed said it was damp, but he couldn’t see any standing water.

IMG_0718

Overgrown here too

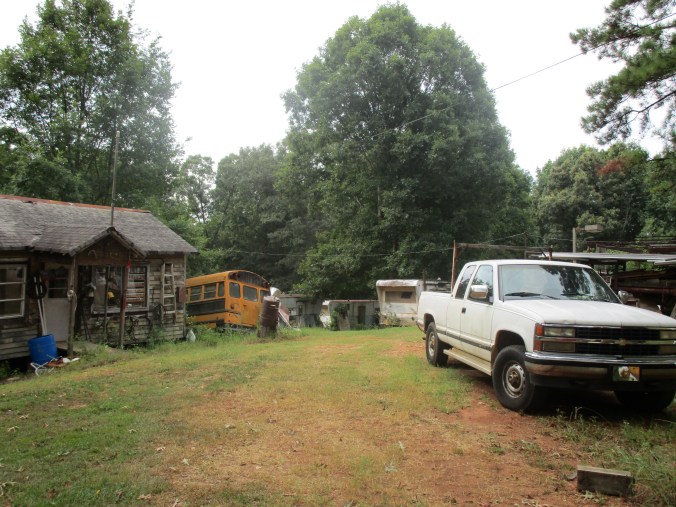
There are spigots outside the barn and at a few other places on the property, but they are old and do not turn. The one outside the barn is competing with a mulberry tree, and losing.

IMG_0713

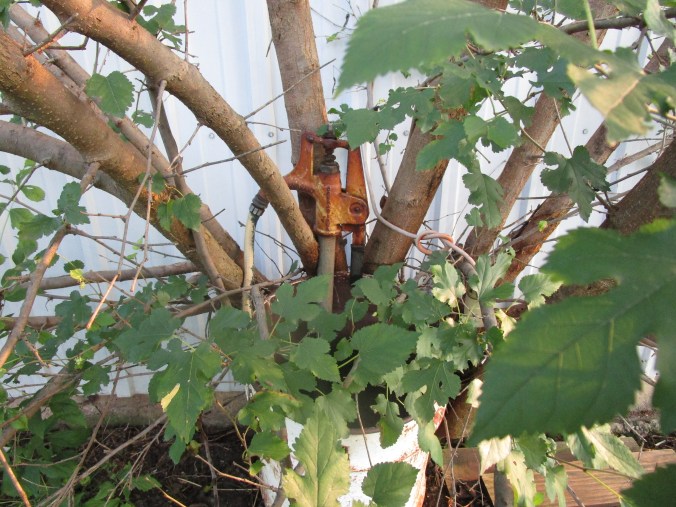
The spigot and hose outside the barn

There is what is probably a cistern outside the detached garage, but it is covered with a cement slab that would take a tractor or a pair of mules to move.

IMG_0697

Possibly a cistern

We made plans to fix all that, and install our rain barrel that we brought with us.

IMG_0712

The rain barrel today.

Have we done any of that? No.

So, here we are, four years later, in a serious drought. County officials have asked that we use water for people and livestock only. Our trees seem to be hanging on, and we have had just enough rain lately, to keep our little bit of garden alive. It isn’t producing well though. In addition to the super dry and hot conditions, there have been pests I’ve never seen before, like Blister Beetles.

blisterbeetle1

Blister Beetle Image from blog-yard-garden-news.extension.umn.edu

The did a number on my tomato plants before I discovered them. Then I dusted with diatomaceous earth and haven’t seen them lately. I’ve also seen wild plants I’ve never seen here either, but I’ll save that for another post.

What should we have done? We should have cleaned out the well, fixed the pump and got the water tested. Even if we couldn’t drink it, we could have watered plants with it. Then we should have repaired and/or replaced the spigots at the barn and pastures. We should have fixed our rain barrel (the spigot is missing), got more barrels and set up a rainwater harvesting system. The University of Missouri Extension has an interesting three page PDF about rainwater harvesting. Lastly, we should have opened that cistern, repaired it if we needed to, and used it to store whatever water we harvested.

A couple weeks ago, I was talking to a neighbor who has lived in his house for about 30 years. This year, for the first time, he opened his cistern and pumped out what he thinks is 30 year old water, to water his garden. He doesn’t ever remember it being this dry, but he did have a backup plan, didn’t he?

As they say, hindsight is 20/20. The good thing is that we can still do those things, some of them will just take a little more work than they would have four years ago. Guess what just got moved up on the priority list after fixing the chicken coops? We’ll keep you posted on how it’s going.

Connie

Minding Your Own Beesness

IMG_0663

Me in my bee suit with some of my tools. Nothing major happening, just visiting the girls and checking conditions.

Start with this simple fact. If you buy a nucleus of bees and the necessary hive equipment, you are going to be out around three hundred and fifty bucks. Ouch right? This being my third year working with bees I have put out, just for start up equipment, about nine hundred bucks.

You can purchase boxes of bees, I discussed what all that means in another post, and that will save you plus or minus seventy-five bucks a hive. The down side to boxes is that they do not provide an active “mini-hive” like the nucleus does, so it takes longer for your hive to get grounded, start producing brood and honey, and get stronger.

IMG_2032

This is a box of bees.

0501161325a

This is a nucleus of bees. Called a nuc.

Buying your way to an apiary is expensive, so what can you do about that? Basically there are three strategies to grow your apiary without have to sell the children to the circus. They are as follows:

Split Hives: Take a strong over populated hive, catch it before it begins to swarm and split it in half.

Trap Bees: Set out your basic bee traps and capture bees who are swarming.

Remove bees for others: People often have trouble with bees, but these days are more aware of the declining bee population. So, rather than kill them, they want people to come take them away.

This year so far, I have been involved in two out of three of these methods with mixed success. Over my next three posts, I will talk about all three, starting with taking out a hive at someone’s request.  Then I’ll talk about splitting, and finally, the one I haven’t done yet but want to very much: trapping swarms.

First allow me to update you about the general condition of the bees. We started the spring with one hive that had made it through the winter. No one was more surprised or happy than me. After losing both hives to beetles the year before,, and one hive to unknown causes during the winter, one success was just wonderful.

IMG_0658

This is a look at the bottom deep (there are two) in my newest hive. The deeps are where the Queen lays the brood and where the bees put their honey. The supers, smaller boxes, are for our honey.  Note the little plastic thingy upper right as you look at it. That is a beetle trap. So far no problems but you are going to see lots of beetle traps in my hives.

I ordered one more nucleus of Russian Bees during the spring. During the summer, the surviving hive was split. We also gained a hive though taking bees out of a house. I will talk about splitting and pulling out bees in the next two posts.

IMG_20180720_105618698

About 2:00 PM: even the busy bees are lazy on days this hot.

IMG_0662

Not a great picture but an improntu waterer. Experience has taught me you have to have some place for the bees to land because bees are not great swimmers. I have learned since this, that you really need to move it a little further from the hives, because bees do not forage right outside their door.

This summer has been very hot and dry. I am at the point where I am going to be putting out water for the bees. Today we are over 90 degrees and, as you can see by these pictures, nobody wants to go outside. Not the bees and not me. Maybe as it cools off.


IMG_0657

Hard working ladies and pretty honey. But this is all theirs.

But I looked late last week and everybody was fat and sassy, with some of the prettiest honey I have ever seen. I will check them tomorrow morning, and see how that is going. When I post another in this series, it will be about pulling bees out of places for other people, and trying to start a hive or hives from them.
This was my first try at that so I will be able to tell you about all kinds of things I did wrong, and hopefully you can avoid my mistakes.

Ed


Endangered Skill 8: Making Do With What You Have

Much of what we have talked about in this series of Eight Endangered Skills can be summed up with the phrase “making do”. It means using what you have to meet your needs. When the people we know as the pioneers made their way across this country in covered wagons, they built their homes in places where there were no stores, and the neighbors were miles away. All they had was what they brought with them in that wagon, and what they could get from the land around them. They had to make do with what was available to them. Learning how to do that was often a matter of life and death.

Those lessons were passed down to their children, and in many cases, forgotten when life got easier. Many of our our grandparents and great-grandparents relearned them from living through the Great Depression. Again, those lessons have largely been forgotten. We really need to work on reeducating ourselves.

Today, for most of us, especially here in America, it is pretty easy to just go buy what we need. Even if we can’t get it today, we’ll be able to on pay day, right? Well, what if we couldn’t? What if there was no money to go to the store, and there wasn’t going to be any soon? Worse yet, what if there was no store to go to even if we had money? Then what do we do? Well, no, we’re not living that scenario now, and we may not any time soon, but I wouldn’t want to wait until we are, to figure out what I might need to do to survive.

While money is available, at its simplest, making do means spending frugally, and living within your means. Don’t spend what you don’t have. Get out of debt and stay out. If you don’t NEED it, don’t buy it. Just in case some of you need a refresher on needs and wants, let’s put it this way: You need to eat, you don’t need to eat ice cream. You may want to eat ice cream, but you don’t need it. Seriously think about your wants and needs. Do you need new shoes now, or do you just want a new pair. Can you fix what you have? If not then by all means, go buy it, but be a smart shopper and look for real value. That might even mean spending a little more for something that will last a lot longer. Buy the best you can afford, but make sure you can afford it. Buying “cheap” can really cost in the long run. There is an old saying that goes “you get what you pay for”, and it’s true.

Closely related to spending frugally is to take good care of what you have. Make sure you eat that healthy food that you bought. Having to throw out food because it spoiled before we ate it is super frustrating for me. It’s like pouring money down the drain, or into the compost pile. Buy the best food you can afford, or better yet, learn to grow it, preserve it and cook it yourself. Yes, that might mean spending some money initially, but you will save much more in the long run. Take good care of your belongings. Put tools away when you’re finished with them instead of leaving them somewhere where they might be lost, or ruined (like out in the yard where they can be rained on or run over!). I could go on and on, but I’m sure you get the idea.

Let me stop here and say that Ed and I are just as guilty as anyone else about this. We try to be good stewards of what God’s given us, but we don’t always succeed. When we don’t, we try to learn from our mistakes and do better next time. We still have a long way to go, but we’re working on it.

One of Ed’s favorite phrases that he picked up in the Army is “improvise, adapt, and overcome”. That is the next part of making do. If you don’t have it, and can’t buy it, you need to use what you have. Many cooks know how to make “emergency substitutions” of missing ingredients. How do you make substitutions for other ingredients you might not have? You use ingredients you do have. You can learn to substitute what you don’t have with something you do in just about any situation. One of my friends told me once about someone using the soles of old shoes to replace broken hinges on a screen door.

My dad says that when he needs something, he makes it. What he is saying is that when he can’t get what he needs, he makes something that will work from what he already has. In order for that to work though, he must have stuff to work with. You have no idea how much stuff he has , but we’ll get to that in a bit.

In order to make do with what you have, you need to have something to make do with. So, the first thing you need to do is think before you throw something away. Ask yourself if that item might be used for some other purpose. If it might, hang on to it. Now before some of you freak out on me, I’m not suggesting that you never throw anything away. There are some things that need to be thrown out, but probably not near as much as you might think. We live in a throw away society, and it’s to our detriment.

Yes, you can take keeping stuff to the extreme. (You can take anything to an unhealthy extreme). I have to make myself purge my supply of junk on occasion before it takes over the house, the garage and the barn, but the thing is that when I need to improvise, I can usually find something that will work. My grandpa (Mom’s dad) was the same way, and he went overboard with what he kept, but he was very, very good at improvising.

There are many advantages to this type of making do. One is that we save money.  Another is that we learn to be creative. Once you start exercising that creative muscle, you’ll be amazed at how well you can improvise. A third is that we start to be appreciative of what we have.  The more we appreciate what we have, the less we need something more.

In addition to hanging onto some “trash”, you also need to think about learning how to repair what breaks, instead of throwing it away and buying a new one. We’ve already talked about this in another endangered skills post.  This also includes learning how to darn socks, sew on buttons, patch clothes, etc. Then when those clothes really do wear out, you can use the rags for other purposes, like rag dolls, rag rugs, or just cleaning rags.

IMG_0664

Last winter I made this rag rug for Bam Bam’s room in the basement. It’s made from old flannel sheets, and it’s great for keeping his feet off that cold basement floor.

You could even take it further and learn about appliances and electronics. Not only might you be able to repair things yourself, you could gain an understanding of how the parts work together, and what else might work instead. Bam Bam is really good at that. If you have an aptitude for that kind of thing, you might even build yourself a side business from it. Bartering is always a good way to make do. You trade something you have, or a skill you posses for something you need.

Back to my dad. He was on his own, for the most part, from the time he was about 13, and he learned early how to make do with what he had. Still functionally illiterate, everything he has learned came by watching, listening, and asking questions. He repaired shoes, dug ditches, ran construction equipment and built silos. For many years he worked in what he calls “salvage and demolition”. He and his partner tore down old buildings by hand. Sometimes, he was told he could have whatever was left in the building. In addition to that, he brought home anything from the building that was salvageable. Any time he sees something on the side of the road, he brings it home. He rebuilt an entire house from salvaged materials, and sold it. Last summer, Ed, Chicken Girl and I went to visit my dad in Georgia. It was the first time I had been there in 20 years. It hadn’t really changed that much, there was just more stuff.

He has a workshop down the hill from the house, and then he has other storage buildings that for the most part, aren’t buildings. They are things people wanted rid of, and he was happy to take them off their hands.

IMG_0074

This picture was taken from the car port near the house. The house down the hill is actually Dad’s workshop.  This is the tip of the iceberg.

IMG_0079

Closer to the work shop. Past the school bus, you can see some trailers. I’ts all used for storage

I took a lot of video. This is just a small sample so you can get the idea. My editing skills aren’t the greatest, and this is a free version of editing software, so, like I said earlier, you get what you pay for. The first part of the video is inside his workshop, the last part is inside one of this many containers. This one has hardware. He has others with antiques, light fixtures, electronics, books, lumber and probably just about anything else you can imagine. I mainly wanted to show you some of the things he has made. Oh, and Dad’s language can be a little coarse so, just be forewarned.

Yeah Dad is the extreme. If you think it’s overwhelming in the video, you should see it in person. I don’t know if you could hear the video all that well, especially in his workshop where the monster fan was running, but everything he showed us, he found either inside a building he was tearing down, in the trash by the side of the road, or someone gave it to him. He keeps it all. If the right buyer comes along, he sells it. If not, he just keeps it until he can make use of it. Oh, and every building on the place has it’s own hammer, screwdriver, pliers, etc., just in case he needs it.

For the rest of us, making do is really a mind set. You have to change how you think. Challenge yourself. How many ways can you make do? Let us know in the comments here, or on our Facebook page.

Connie

Other posts in the Endangered Skills series

Endangered Skill #1: Shoe Repair

Endangered Skill #2: Black Smith

Endangered Skill #3: Small Appliance Repair

Endangered Skill #4: Reading the Weather

Endangered Skills Number 5: Orienteering Part 1

Endangered Skills Number 5: Orienteering Part 2

Endangered Skill #6: Foraging

Endangered Skill 7: Making Your Own Entertainment, Part 1, Musical Instruments

Endangered Skill #7 Making Your Own Entertainment, part 2: Homemade Toys

Endangered Skill #7 Making Your Own Entertainment, part 2: Homemade Toys

She was a little tiny woman who was my Great Aunt Hazel’s daughter. Her husband was an old school mountain man who worked his own backhoe for money when he wasn’t too busy hunting and fishing.

They were Toot and Peanut. Heaven help me, I do not know their real names and I bet most of my motley crew of cousins don’t either. But we do know why they called him Toot. Because Toot made whistles.

Oh they were great, and half the fun was watching him. He would casually cut off a green twig, shape it down, push the pith out of it with whatever came to hand, cut a hole in the top and hand you a whistle. Total elapsed time from twig to whistle; just minutes, and the rest of the afternoon’s worth of entertainment.

At every family gathering Toot was easily found by following the trail of wood shavings and kids who were fast ruining their good clothes and blowing whistles.

In this day of Cell Phones, Xboxes, computers, tablets (Not paper, some other form of computer. Don’t ask me to tell you much about them), and heaven only knows what else it, seems odd to talk about homemade toys, but I will make a bet with you.

Have a picnic and get somebody like Toot out there making whistles and watch the young ones gather ’round. There is just something magical about someone who can turn a stick into a toy.

Of course, in Appalachia where I was raised, a stick was already a toy. A bat, a gun, a sword, Little John’s cudgel, a magic wand and the list is only limited by our imagination.

Some of the things my buddies and I made for entertainment and sport were:

A bow and arrow. Again, sticks, preferably hickory if you wanted to make something really lethal that would last but any green stick would do for a toy.

Then you need a string, check Mr. Rabb’s bailing machine and now we have string. Carve your notches in both ends using your Barlow and then stretch it to bend the bow. If it breaks you got the wrong kinda stick start over.

Now we need arrows which is to say smaller green sticks. The very creative would find and attach heads to their arrows, some used rocks but a pair of tin snips and an old tin can would yield six or eight nice ones. It’s amazing we lived and a heavenly miracle we all have both eyes.

Rainy days in the mountains can stretch for a week or so. Now you got two boys stuck inside with you and, here it comes, “We ain’t got nothin’ to do!” Grandma found an old larger piece of cardboard and her yard stick. In a few minutes she had a checker board and the button jar supplied the checkers. That kept us busy until the rain stopped.

Another favorite was the Button on a String toy which some called Dancing Buttons.
IMG_0646

Home made sleds were a big hit. Most of ours were made with left over scrap lumber taken off of finished jobs by my Great Uncle Andy who was a house painter. They were heavy, bulky and subject to dump you out and roll over you but we had a great time.

For a child with an imagination almost anything becomes a toy. Just watched a Tarzan movie? Great! The mountains are covered with grape vines as big around as your arm. Lets go play Tarzan. That one cost me a half dozen fractures from one fall. Two and a half months later, I was at it again.

I am going to turn this to Connie now who has some information about toys her Grandmother used to make and maybe she can talk about homemade dolls and such. I don’t know nothin’ ’bout no girl toys. At least nothin’ I am going to admit.

Ed

When I was a little girl in the late 1960’s/early 1970’s, I stayed with my great grandma a lot. She was in her seventies and lived in a tiny trailer on a fixed income. To me it was the most wonderful place on earth. She had an incredible imagination, and could make a game out of just about anything. I think she probably had a lot of practice growing up. We pretended a lot. She told me stories, recited poems, and sang songs. She taught me to play rummy and we pretended we were the Maverick brothers (from the TV show) playing poker. One thing I remember her doing was taking a Kleenex, folding it in half, rolling two opposite corners toward each other, and making what looked like a baby in a blanket. I cannot for the life of me remember how she did it. It seems there was Kleenex involved with clothes pin dolls too, but I don’t remember how. She may have wrapped the clothes pin with a Kleenex, and held it with a rubber band for a belt, but I’m not sure. We cut out paper dolls too. They weren’t the prettiest, but we had a good time, and we laughed a lot.

On the subject of dolls. Once upon a time, they were made from rags, handkerchiefs, corn husks, socks, scraps of yarn and just whatever else was available. There is a good tutorial for corn husk dolls here. Another site sells kits for old fashioned dolls. Each kit description carries a link to the history of that type of doll. I thought it was cool. Most interesting was the history of clothes pin dolls as well as the history of clothes pins.

Here is my attempt at a yarn doll. She took about 20 minutes. I’m keeping her simple for now, but I feel like she needs a face and an apron. I found the basic instructions here  IMG_0643

I made this little clothes pin doll in about 10 minutes. I just wrapped him in yarn and drew his face on with fine tip markers. The hair came from the scraps left over from the yarn doll. This has links to all kinds of clothes pin doll instructions.IMG_0644

Ed mentioned his grandma using buttons for checkers. When I was little, probably three or four years old, my mom would go visit a friend whose mother was bedridden. She would always tell her daughter to give me her can of buttons and some string. I would spend the whole time stringing those buttons. Then when it was time to go, I would just dump them back into the can. It kept me occupied the whole visit. Yes, I know. It’s doubtful that would keep a three year old occupied today, but it might.

As for making games, my step father used to draw out the game board for Battleship on a pieces of yellow legal pad paper. He would draw columns for the numbers and rows for the letters When we would play, we would just draw an x in the boxes made from the intersecting columns and rows in order to place our ships and record hits and misses.

Give a child an expensive toy and he will play with box. (At our house, when the child is finished playing with it, the cats take over.) The point is the most important toy a child can have is a good imagination. I fear that may be more endangered than anything else we have mentioned here.

IMG_0648

Connie

Endangered Skill 7: Making Your Own Entertainment, Part 1, Musical Instruments

When I did the original post for Eight Endangered Skills, I listed making and playing your own instruments, and then said it also reminded me of making toys. The point is that our ancestors knew how to entertain themselves, and they learned to have fun with whatever was available. That may be the skill that is truly endangered.  Today’s post will focus on music, but we’ll look at toys and other forms of home made entertainment in a future post.

Music is universal. Yes, styles vary by era, by culture and by personal taste, but it is there nevertheless.  People have made and played their own instruments as far back as we can remember. In the Bible, musicians are first mentioned in Genesis chapter 4. “ His brother’s name was Jubal; he was the father of all those who play the lyre and pipe” (vs 22).  The one instrument we all carry with us, whether we use it or not, is the human voice.

I was hoping Ed would write this post, since he did most of the work,  but his job schedule has changed a little, and we are still adjusting. When we started working on this series last summer, I found this article from Mother Earth News.  I knew that we had to try and build a gut bucket, aka washtub bass.  We would need a wash tub, something for the neck, something for the string (a plastic coated cable was recommended),  and a way to attach the string to the wash tub.

I will admit that I kind of struggled with giving up my old washtub, but I have been promised a new one. Ed found an old closet rod for the neck and asked if I had any tin cans that we could cut the bottoms out of for washers. Was he kidding? Of course I did!  We did have to go buy eye bolts and a small cable.  After we got home, we both saw a cable we could have used, and I am quite sure eye bolts will turn up too.  We learned a long time ago, that the best way to find something you know you have is to go buy a new one.   Once we got started, the whole process took less than an hour.   I have to tell you that Ed had a great time making this.

Chicken Girl was the photographer today.

IMG_0614

hole drilled in the bottom of the tub

IMG_0619

Inside of the tub with the “washer” and the nut end of the eyebolt

IMG_0616

Eye bolt on the outside of the tub

IMG_0622

attaching a ring to the eyebolt

IMG_0613

A notch cut in one end of the rod

IMG_0598

A hold drilled in the other end

IMG_0620

cutting the hook off the cable 

IMG_0625

The cable attached. Notice the notch on the rod hooked on the rim of the tub

IMG_0628

attaching the other end of the cable to the other end of the rod

IMG_0634

The finished product

Most home made instruments don’t need anywhere near that kind of time or construction. Have you ever given a small child a pot and a spoon? Yep, instant drum!  Different surfaces and different materials make different sounds and lend themselves to all sorts of “instruments”.  Dried beans in a tin can?   Maracas!  A comb and tissue paper? A kazoo!  Glasses filled with different levels of water? Chimes! The possibilities are probably endless, limited only by imagination. The best thing is that you don’t have to be a “musician”. You can just have fun with it.

You can buy specially made musical spoons today, they didn’t start out that way.   Ed actually got some pretty good rhythm going for awhile with two spoons from our kitchen.

Musical saws can also be purchased, but you don’t need a special one to learn. You do however, need something to use for a bow.  Chicken girl was greatly concerned when I experimented with an old hand saw and her violin bow.  I did manage to get a little sound, but probably needed a more flexible saw. The bow was no worse for the wear.
This is a basic tutorial on playing the saw, and Wikihow has instructions for making a bow here.

IMG_0637 (2)

Well, something like that anyway

Several years ago, Ed and I started collecting primitive instruments.  We used to play music at a couple different places and we liked to hand them out to whoever was there listening, and invite them to play along. We never got too many takers, but we did have fun, which was the whole point.

In addition to our usual  instruments (guitar, mandolin, harmonica, etc), we have a washboard, a jug, a cowbell, and now, a gut bucket!  IMG_0638

Do you play an instrument? Have you ever made your own?

Connie

While We’re Waiting

While we’re waiting for Ed to figure out that washtub bass, I thought I would fill you in on our last year, and share some plans for upcoming posts.

Last August, we took our first ever family vacation. We went to Georgia to visit my dad, then to Charleston SC so Chicken Girl could see the ocean. From there we went to Greenville SC to visit Ed’s daughter, and on to North Carolina to visit Cherokee and see where Ed’s grandparents lived when he was a boy.  We put 2600 miles on my car and made some great memories. There will be more about that in later posts.

While we were gone, James was supposed to stay here and take care of the critters.  Well, that didn’t go quite as well as we had hoped.  To make a long, sad, story short, James was not able to fight his Meth addiction and surrendered his probation. The judge gave him nine years.  The blessing in that is that he is clean and sober.  We pray that this time he gets the tools (and the desire) he needs to stay that way.

In the meanwhile, Bam Bam’s life kind of fell apart too, and he is staying with us again, along with his two small dogs, Rex and Gracie. They have been with us since December. It’s been nice to have him home again, and he is a big help. The little dogs provide a lot of “entertainment” although the cats are less than impressed.

Kyle and dogs

Bam Bam with Rex (black) and Gracie (white)

The big dogs are doing ok. Some days, Libby really shows her age, but I think we’ve stopped her digging out. Meeko still climbs out, on occasion, comes to the back door and barks! I think he wants to play with the little dogs, who aren’t terribly sure that’s a good idea.

On a positive note, we have finished homeschooling and Chicken Girl graduated on June 3rd. She is now taking an online Voice Over class, since she wants to be a voice over artist.

20180603_143119

Chicken Girl at her graduation party

As for the chickens, with the exception of one hen we lost to illness (we’re not sure what), they are all doing fine. We get between one and two dozen eggs a week, which is more than enough for us.  We are working on rebuilding the coop (again), as well as some new chicken tractors.

IMG_0576

Sunny about ready to fly the coop!

This spring has been an exciting time with the bees. Currently we have four hives. One we bought as a nuc, two from a hive we split, and one we took from an old house. I know that Ed will want to tell you all about that, but I will say I have finally put on the bee suit and started helping him. Capturing that wild hive was amazing!

IMG_0491

The wild hive was behind this wall!

Weather wise, things have just been strange.  With the exception of about a week of frigid sub zero temperatures, last winter was mild and dry. We didn’t get much spring. It just went from cold to hot, and still very dry.  We finally got some rain yesterday, but we need more.  The grass is dry and crunchy, but the plantain is doing beautifully!

IMG_0590

All the green is plantain. The brown is grass

We bought some fruit trees as well as some elderberry bushes planning to create fruit tree guilds. Well, we didn’t get as far into that as we would have liked, but we did get all the trees in the ground and they are hanging on.

IMG_0587

An apricot tree with mulch inside the drip line. We plan to plant understory plants here later.

Ed and Bam Bam built me a basement greenhouse, so I was able to get some seeds started. The only problem was that when they were ready to go outside, the weather was still too cool, and then the tiller broke down and Ed wasn’t able to get everything tilled.   We improvised and got everything I started planted. Some things didn’t make it, but most are, like the trees, hanging on.

IMG_0593

The greenhouse

IMG_0581

Tomato plants in the garden

After three years,  the blackberries are producing! Then a few days ago, I discovered wild raspberries growing behind the barn. This must just be a good year for berries. The mulberry trees in the fence rows are full of fruit in varying degrees of ripeness. The wild grapes have taken off too.

IMG_0577

Blackberries!

IMG_0571

Wild raspberries behind the barn

Well, I think that is pretty much everything. Hopefully, Ed will have that bass built next week, and he’ll post about that and all the other ways you can make your own musical instruments.

Connie


So Hey, Where You Been?

.

Let me start with an honest apology for leaving anyone who is interested in this blog hanging for a year. That was wrong and I would love to give you some really dramatic life changing reason why we did not post, but there isn’t one.

For those of us old enough to remember letter writing, did you ever start writing to a distant loved one and then you skipped a day? That was cool, you can make it up tomorrow. OK, maybe not but you will write an extra letter next week. WHAT! Its been a month??

Now you are just embarrassed, humiliated and have no idea what to say to make it right. Then, well then, its a year, and they are wondering what they did to make you hate them.

So that is kind of what we were going through. Oh yes, there was drama and business and emergency peppered with rank foolishness, but those are excuses and I learned early and the hard way not to make excuses.

So, instead of excuses… I make jokes.

TOP 10 REASONS WE DID NOT WRITE IN THE BLOG

TEN: We were kidnapped by aliens:

Seeing as how my “other job” is working the overnight shift in an all night diner, this is not as far-fetched as it might appear. Some of the people who stagger, slither, swagger and sway into my place of business around 2 AM are probably aliens.

However, I do not believe they are the kidnapping type alien, nor are they the SWALLOW YOU WHOLE while slobbering acidic slime type aliens. My alien customers are probably no more dangerous than your average Unitarian.

NINE: Meeko ate our blog posts:

Again, there is an element of believably in this for anyone who knows our Meeko. Saying that Meeko has a voracious appetite is something of an understatement. The only thing we know he won’t eat is Libby and, if you notice, she has a tendency to keep moving.

Meeko sets no store by all that chewing and tasting foolishness. He goes directly to the swallowing part. So, had our blog post landed somewhere near his food bowl, which is to say anywhere he could reach, he might very well have eaten them had there been anything to eat.

0515180815

Meeko who loves to lick faces and eat things that would make a buzzard wretch. But he’s my dog.

EIGHT: Donald Trump did it:

I have no idea where I am going with that, and it makes no sense, but it seems to be working for the media.

SEVEN: I won the World Series of Poker:

Again, no idea where that came from. I used to be a fair to middlin’ poker player, but I haven’t played in years. If I, in fact, paid the entry fee to get into the World Series of Poker, that would explain why we had not written. I would be dead and Connie would be doing time.

SIX: Our Internet Connection Went Out:

I know who’s internet goes out for a year? Considering our home phone lines will have been down for over a month, when and if we get it fixed that is not as far-fetched as it first appears. No, it isn’t true, but it is quite possible out here in the hinterlands. God bless country living.

FIVE: (INSERT CONSPIRACY THEORY ORGANIZATION HERE) Forced us to quit writing our blog:

I know its silly, but I just added upwards of a hundred Wing Nuts to our followers.

FOUR: Connie was called back to Active Duty to assist Military Intelligence in finding out what happened to the World’s Supply of Common Sense:

I don’t know anything about it. Connie couldn’t tell me and, at my age, I would have forgotten by now anyway.

THREE: I was arrested and convicted of Reckless Walking and Attempting to Crawl:

No, don’t worry, I am still sober (nine years now), but many years ago I did get held for a few hours in a small Texas town and when I asked about the charge, the big Police Officer used that phrase. As a Word Mechanic, I have loved it ever since.

TWO: I spent the year on a mountain in Tibet learning to meditate:

Yeah right, if I spent a year on a mountain in Tibet I would have been meditating on how to GET OFF THE MOUNTAIN!!!

ONE: We were working on a series about homemade musical instruments. I was asked by Connie to make a kind of bass out of a pole, a washtub and some string. Its been a year and at least I know where the washtub is.

The law is called Entropy, and it states that any closed system has a tendency to run down over a period of time unless you add energy to it. We just quit adding energy.

Anyway, we are back and we are sorry for the delay.

Right now I have to go make a bass, if I can find a decent pole.

Endangered Skill #6: Foraging

Foraging generally means finding food that is growing wild. In an emergency situation, being aware of what grows wild where you live, and how those things can be used for food and first aid could be a matter of life and death.  Even in everyday circumstances, that same knowledge can save you money on groceries. Usually you can find food growing wild your yard. You probably call it weeds.

My dad hates “greens” of any kind, because (he says) they had to eat so much of it when he was a kid. He grew up poor and his family ate wild greens a lot. He particularly detests dandelion greens. Yes, I have picked and eaten raw dandelion greens. To me, they don’t really taste any different than other greens that you might buy in the grocery store. I’ve also fried dandelion blossoms. Chicken Girl wasn’t impressed, but Ed and I liked them.  One note about wild greens: if you’re picking them to eat raw, the best time is early springs when the leaves are small and tender.

I think I may have told you this before, but several years ago, when we still lived in Independence, I had the opportunity to attend a Wild Edibles workshop at the Burr Oak Conservation Center. The ladies running the workshop called themselves the “Wild Ones”. I think the youngest of those ladies was probably in her 50’s, but the oldest was somewhere around 80 years old. Her name was Frances Matthews, and there is a great article in the Missouri Conservationist about her, the Wild Ones and wild edibles. You can read it here. The day I attended the workshop, they taught us about different kinds of wild edible plants, and we got to taste some things like dandelion jelly, wood sorrel tea and stuffed yucca  and daylily blossoms.  (Chicken Girl really likes daylilly blossoms. Be sure to remove the stamen, pistils etc, from the center of any blossom before eating.)

Since then, I feel like I’ve learned quite a bit about plants that grow in the wild, especially the ones that most of us call “weeds”, but I know that I still have a lot to learn. When I started working on this post, I remembered I had written a few other posts about foraging, so I decided to refresh my memory before I went any further. I’m glad I did. I had written more about it than I thought. If you want to see my other posts that have foraging info, find “Foraging” in the Categories list to your right. I have written about Goldenrod, Mallow, Mullein, Queen Anne’s Lace, Chicory, and my all time favorite, Plantain.

Over the last three years, I’ve learned about a few new plants found on our place. I showed you pictures of wild grapes a few weeks ago. Along the same fence row as the grape vines, we have wild roses. I noticed what looked like berries on the roses, did a little research and discovered rose hips.

Rose hips are the fruit of the rose plant. Most of the time we don’t see them because people dead head their roses. That means they pull off the spent blossoms, which encourages more flowers to grow. It also prevents hips from forming. From what I read, rose hips are harvested after the first frost of the fall, and then can be used either fresh or dried.

“Gather fruits (hips) as they ripen in autumn (after frost) or during winter, wash and remove dried persistent flower parts from top of hips, then split open and remove seeds. Eat pulpy portion fresh or in jellies or sauces. Dry whole or half cleaned fruits  for later use (soak overnight in warm water), or finely grate or grind dried hips to yeild a slightly fragrant powder rich in vitamin C and essential minerals. Sprinkle on hot cerials or use to make hot tea. Also wash young leaves, cut into small pieces and dry for hot rose tea. Flower petals can be used in candy, tea, and jellies, but fruits are more nutritious.” (“Edible Wild Plants: A North American Field Guide to over 200 Natural Foods” by Thomas Elias and Peter A. Dykeman, pp 220-221)

They’re supposed to be good for inflammation too.*

In the spring we had Pineapple Weed growing down the center of our driveway. I just noticed the other day that it’s gone for the year and I never did get any of it. It is so named because, when you crush the leaves, they really do smell like pineapple.

The flowers and leaves are edible. You can get more details about Pineapple Weed and many other wild edibles at Wild Edible food.com.

There are so many wild growing plants that are edible and/or have medicinal value, we have just barely scratched the surface. We haven’t even talked about wild mushrooms and other edible fungus, mainly because I don’t know enough about it to share. It’s on my “to learn” list though.

To pick up this “endangered skill”, you need to learn about the wild edibles in your area. There are all kinds of online resources, like this one , but be sure to get a good hard copy field guide like the one cited above too.  That way you have something to carry with you for those times when the internet is not available. Also, make sure the areas from which you gather have not been sprayed with chemicals designed to kill weeds.

Happy wild edible hunting!

Connie

*Disclaimer: We are not medical professionals. All the information posted here is for educational purposes only and is not intended as, or to replace medical advice.

Endangered Skills Number 5: Orienteering Part 2

IMG_0044

This is the map of our local area. The big city of Braymer, Missouri is the pinkish spot in the upper right (north east) quadrant.

When I was promoted into the ranks of a Non-commissioned Officer in our United States Army these many years ago, this newly formed Buck Sergeant was taken aside and taught the first absolute of being a good Sergeant. A crusty Platoon Sergeant with a marked Spanish accent said, “Sergeant, you will NEVER let a 2d Lieutenant hold the map and the compass at the same time.”

Land Navigation, as the Military calls it, is a vital skill and it starts with understanding what you are dealing with. I am not going to have the time or the space to teach you how to navigate using a map and a compass, the best I can do is list the skills necessary to navigate with a map and a compass. Perhaps I can also highlight some common errors people make.

For more in-depth information I am going to refer you to Field Manual (FM) 3-25.26 Map Reading and Land Navigation.

Also, for good cheap or even free Topographical Maps I suggest you look up the United States Dept of the Interior Geological Survey. These are the kind of maps that, when I say “map” I am talking about.

1. A compass is a device that points to magnetic north. For the purpose of using a map there are THREE different norths:

a. Magnetic north is governed by the magnetic pull of the earth that draws your compass needle towards it. It is located generally around Hudson Bay but it moves.

b. True north is the actual point of north. The Top of the World if you will.

c. Grid north is where your map’s grid lines point to as north.

At the bottom of any good map there should be some kind of declination diagram or at least a pointer that points to true north. On short trips the difference between true north and magnetic north should not cause you much error. In Missouri the declination is 1degree 6 minutes east which I determined by visiting this site.  This means that, to adjust to true north I am going to have to subtract 1.6 from my compass heading.

Are we confused yet?

Let’s talk about compasses. I prefer the Lensatic Compass that is issued by the military, because it is accurate and designed for use in the worst kind of conditions. However, any decent magnetic compass will do as long as you know how to use it.

lensatic compass

U S Army Illustration

The compass on your watch band, in your fancy survival watch, the handle of your knife or the one you got out of a cereal box is probably OK for determining general direction, and it is better than nothing in a pinch, but I would not like to walk twenty-five miles using that type of compass to choose my direction.

2. Lets talk about maps for a minute. For my purposes, I am talking about a to scale two dimensional representation of a three dimensional surface of the earth. (I can remember that definition from twenty years ago but I cannot remember where I left my hat. Sigh)

That kind of map is a topographic map which shows elevations, vegetation, bodies of water, and man made objects. Anything less is going to give you problems choosing a good route.

So we have our map in our hands and our compass hanging by a lanyard around our neck. Lets talk about one of the major errors we all tend to make when trying to read a map. I named this error “The North Seeking Jeep”.

People have a tendency to believe that once they lay the map out, the top of the map (representing north) is oriented to the north. So people sitting in their jeeps (yes, I mean officers), have a tendency to believe whatever direction their jeep is facing is north. It probably isn’t.

To orient your map you can use your compass or you can use major linear terrain features you can see (roads, creeks, mountain ranges, power lines etc). The best way is with your compass. Factoring in your declination laying your compass along a north-south grid line and turn the map with the compass until the compass point to north. Until you know how your map relates to the cardinal directions, you better get used to long useless walks. By the way, Connie pointed out some people might not know what I mean by “cardinal directions”. Due North, South, East and West are your cardinal directions. Red birds have nothing to do with it.

There will be symbols and colors on your map. If you are using a Topographic Map from the Geological Survey folks, the symbols and colors are largely standard, but on any map they should be listed at the bottom of the map. Also you will find your contour intervals (the distance in elevation between contour lines) and your scale.

So we have our map. We have read it so we know what the different symbols and colors mean. We know the scale of the map and we have oriented it using our compass, after accounting for the declination, and we are ready to go.

Hold on a second. How far are you going to go, and how will you know how far you have gone? You can use the features on your map to estimate how far you have gone, but sometimes there is not that much difference in terrain features over an extended distance; deserts and plains for example. Now you need a method of measuring how far you have gone, and to do that you need to know your pace count.

In a military patrol two men are assigned to keep up with their pace. Generally they use a piece of para chord tied to their web gear in which they tie a knot every 100 meters. You may not need to use this technique where you are orienteering, but when you do need to use it, you need it badly.

So mark off a hundred meters over terrain, not down a flat highway, and find out your pace count. A true pace is a full two steps. If you step off with your left foot the second time your left foot hits the ground is one pace. My step is generally around 30 inches, and my pace count always came out to about 65 paces per 100 meters.

Oh, one last thing you will need to know. How to find places on your map using the grid system on the map and, in a pinch, the longitude and latitude system. I could try to explain it to you here, but I doubt either one of us have the patience for that. Get the FM I suggested or any other good orienteering\book. Get a map, get a good compass, and prepare to get lost.

Of course you are going to get lost. We all get lost. Orienteering is being lost, interspersed with occasional clarity as to where you are. Kind of like life.

Endangered Skills Number 5: Orienteering Part 1

The story goes that a young reporter found the great surveyor of virgin territory, Daniel Boone, in his retirement in Missouri and asked to interview him. Mr. Boone was never shy about talking about his past, so he agreed. One of the first questions the reporter asked was whether Mr. Boone had ever been lost.

Daniel was said to have considered the question and answered. “No, I ain’t never been lost, I have been confused for a month or two sometimes, but I ain’t never been lost.”

I guess it is all in how you look at it. In the military, where I learned Orienteering, the catch phrase was “miss-oriented”. We never got lost, we were only miss-oriented. Yeah, right.

Whatever name you want to call it, being lost is never any fun, and our ancestors had to deal with the possibility of it because, as Daniel Boone would testify, getting miss-oriented could lead to several months of confusion.

I was raised in the mountains, within walking distance of the Cherokee reservation and the Great Smokey Mountain National Park. It is still a part of the country where a boy could walk off in the woods and not be able to find his way back. My Grandfather taught my brother and I a simple truism that works very well in the eastern Appalachians, and has some application to all mountains.

If you find yourself lost, go down hill until you find water, and downstream until you find people.

With that simple formula, at the age of ten, I was not the least bit afraid to walk Little Mountain, Eagle’s Nest, all around the Balsam Gap, Plott Creek, the Little Pigeon river, and points all around there. I probably took a year or two off my poor grandmother’s life but it was fun for me.

I am going to divide this post into two parts:

Orienteering using maps and compasses.

Orienteering using nature. How our ancestors found their way around before cartography and compasses became common, or in places where maps were simply not yet made.

Lets first look at some not so true truisms:

The sun rises in the east and sets in the west. Unless you are on the equator, NO. For us folks in the northern hemisphere, the sun rises in the SOUTH EAST and sets in the SOUTH WEST. If you are trying to arrive at a point Due East or West of you, then the problem with navigating by the sun should be obvious. There are ways to adjust for that and we will look at a couple shortly.

Moss grows on the south side of the tree. NO. Moss grows on the most protected side of the tree. Remember, I am a mountain boy. Most time moss grows on the up hill side of the tree in the mountains, and that is normally east or west. While moss growth can be a good indicator of direction, it is not completely accurate.

Water flows south. NO Water flows down hill. Whether that is north, south, east or west is another question.

For basic survival skills in the woods, I recommend to you FM 21-76 U.S. Army Survival Manual. Chapter 11 or 18 (depending on your version,) discusses Field Expedient methods of direction finding. I intend to talk about three of these methods, two using shadows and one using the stars.

For simplicity sake, I am going to stick to how this works in the NORTHERN temperate zone. (between 23.4 degrees and 66.6 degrees north). That would be where most of us live. If you are in the southern hemisphere either seek information elsewhere or contact me and I will get it for you.

The situation: You are lost and you have no idea where the cardinal directions are.

The first method I will discuss, is refereed to as the Shadow Tip Method. It is relatively quick and extremely accurate.

1. Find a spot clear of brush where the sun is shinning and a stick approximately a meter (a yard) long.

2. Drive the stick into the ground and mark the end of the first shadow with a stone. This point is ALWAYS the west end of the line you are going to create.

3. Wait fifteen or twenty minutes. If you are really lost, relax for awhile. Running your body dry on adrenaline is not helpful. When the time has passed, the shadow should have moved a short distance. Mark this movement and then draw a line from the first mark through the second mark, extending the line for some distance.

4. Stand with your left foot on your first mark and your right foot on your second. If you are above the equator you are facing in a northerly direction you left is west, your right is east and south is behind you.

shadow tip

FM 21-76

The second method I will discuss is the watch method. This method requires an analog watch. A very good reason to carry my pocket watch to the woods with me. It also uses shadow so we are going to start in a clear place where the sun is shinning and we, again, are going to place or stick in the ground.

1. Place a small stick in the ground that cast a definitive shadow.

2. Place your watch on the ground with the hour hand along the shadow.

3. Find the midway point between 12 O’clock and the hour hand and draw a line through this point. This line is the north-south line with north being in the direction the line is going through the watch. The other directions will be just as we said before. I have used this method while on the move, just to determine if I am going in the right general direction. Just point your hour hand at the sun and look at a point half way between that and 12 going clockwise. That will be generally north.

clock

FM 22-76

Lets talk about the stars now. Again I am staying with the Northern Hemisphere. South of the equator you would be looking for the southern cross but where most of us live navigating by the stars is done by the north star. The rest of the stars in the northern heavens revolve around the North Star.

The North Star (Polaris) is the tail end star in the Little Dipper (Ursa Minor) but that is often hard to find. Look for the Big Dipper (Ursa Major) and on the dipper end you will find two stars that act as pointers. Draw an imaginary line out from these stars and you will find another constellation called Cassiopeia or the Lazy W. Between the two the most prominent stars, you will see is the North Star.

finding north star

FM 21-76


In this day and age of GPS, and even the simpler compass and map, it is hard to believe that our ancestors crossed this country with no better guide than the North Star isn’t it? In the old wagon trains, the lead wagon was always set with its wagon tongue facing the North Star so that the next morning there would be no doubt which way they were to go.

Most times, in those cases where we are lost, it is better to conserve your energy, seek some shelter if necessary and wait for help. But while you are waiting you might want to orient yourself, because sometimes it is going to be necessary to walk out.

When that happens, you are going to need to know something about getting yourself oriented to your environment, so you can make reasonable decisions about where and how to go. What I have shown you here is introductory. It is a sampling of ways to find your direction that have been used for years.