Preserving the Harvest

The reason for having a garden is not only to have fresh fruit and vegetables in the summer, but also to preserve them for the winter months. That can be done by canning, drying or freezing. This year, we didn’t have much of a garden so we didn’t have anything to put up, except for a few herbs that I am drying.  That is about the limit of my drying experience: herbs. My preferred method of preserving is canning although I’m still a novice and have a lot of learning to do. I save freezing for shorter term preservation.

As you know, we planted fruit trees last spring, and while they are all doing well, it will be at least three or four years before they produce any fruit. However, I am getting some preserving the harvest practice in this year because I was given several pounds of pears and granny smith apples.

IMG_0863

img_0865.jpg

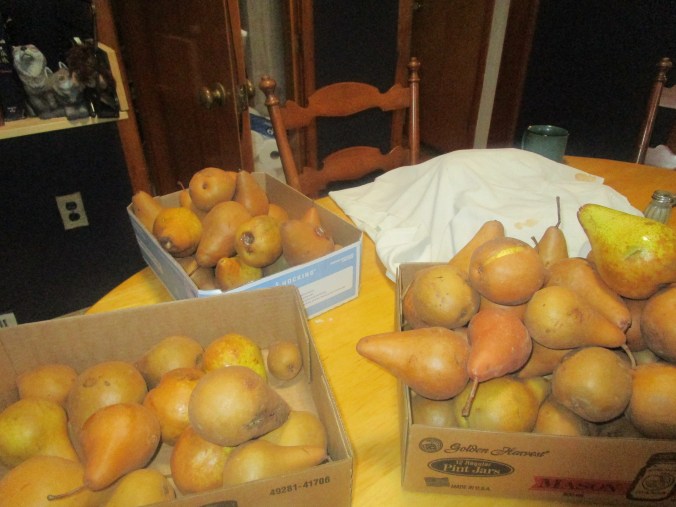
Pears are funny things. They do not ripen on the tree. They fall off and then ripen. You have to catch them quick because the window between green and rotten is very small. So what did I do with thirty pounds of pears in varying stages of ripeness? I made an enormous batch of pear butter. Let me just say in advance, that it wasn’t a good idea.

I used the pear butter recipe in the Ball Canning book. It called for pounds of pears per recipe and gives the approximate yields in pints (this is also where I rediscovered that my water bath canner is only large enough for pint jars) One recipe makes about four pints. First it says to peel and core the fruit. So Chicken Girl and I did that. We had to take a couple breaks to wash our hands and the knives because, if you didn’t know, peeling pears is a sticky mess.

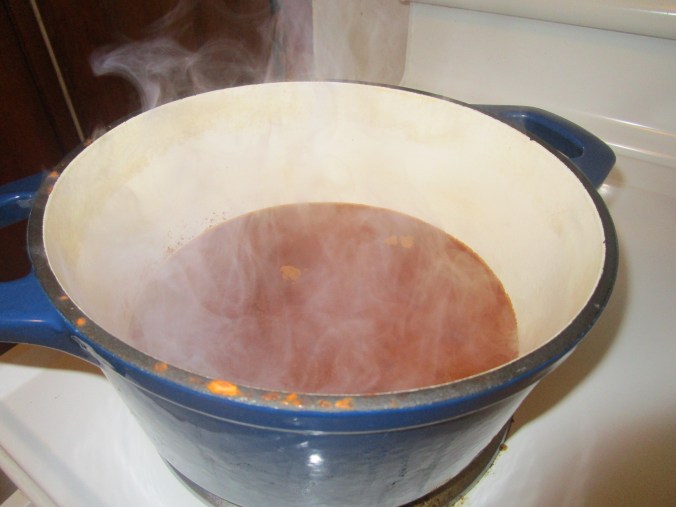
Anyway, we filled my largest stock pot with pears. Then I was supposed to add some water and cook it until the pears were soft…um some of the pears were already soft…Then I needed to use a food mill or a food processor to make pulp, being careful not to liquefy it. A food mill is on my wish list, (and would have been a much better choice) but you use what you have right?

IMG_0866

Yeah, it’s full. Not a good idea.

Then I was supposed to measure out two quarts of pulp per batch. I had six quarts so that is three batches…but I started with thirty pounds of pears which was five batches? Fine, three batches it is.

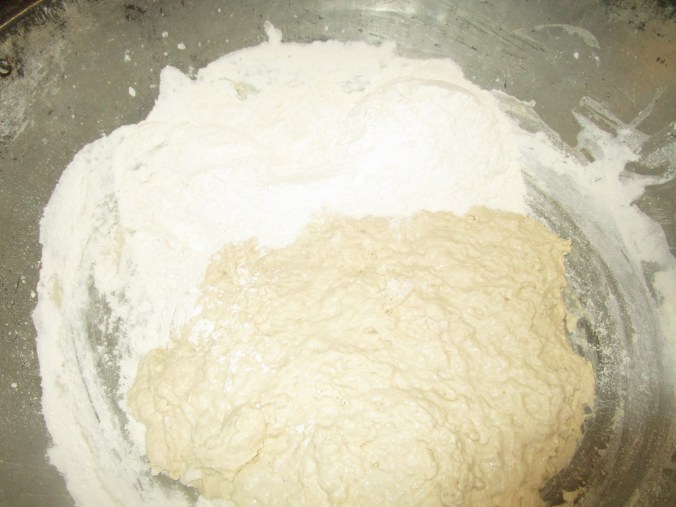
So I added the sugar and spices and put it all back in the stock pot. I was supposed to cook it down until thick, stirring occasionally to keep from sticking. What it did not say (anywhere in the book..I looked) was that this cooking has to be done on LOW and takes a long time (like hours). I had my fire too high and even stirring constantly, I could feel it sticking. What do do. I turned it off and went to look online for more information…Yeah low and hours…oh look there…crock pot! Yes! I have crock pots

So I pulled out both my crock pots and filled them. The bottom of my stock pot had thick black gunk stuck to the bottom that we are still trying to get out. My take from that is that I tried to cook too much at once over too hot a fire, in a pot with too thin a bottom.

Anyway, I left it all in the crock pot overnight. And canned it the next day. I ended up with twelve pints. I’m not impressed with it. Bam Bam said he thought it was ok, but then Bam Bam really likes pears.

As for the apples, learning from the pear butter experience, I went a little different route. First I made an apple pie (I don’t do home made pie crusts very well, but I wanted to give Chicken Girl the experience..she doesn’t do them well either). The pie tasted good, but it wasn’t very pretty. Then I came across a recipe for fresh apple cake. That was so good it was gone in about a day. Unfortunately, I didn’t get pictures of either.

Of course, I had to try apple sauce and apple butter, but only one batch at a time. If I could do that, then I would do more. I found recipes for both that used the crock pot. I’ll try the old fashioned way again, when I have better cooking pots.

I did apple butter first. I found the recipe here. So we peeled and cored the apples. I’ve had this little device for years, and I can’t tell you how much I love it. It pretty much does everything for you. Even if you need to chop them up more finely, it’s easy to do with them already peeled, cored and sliced.

IMG_0876

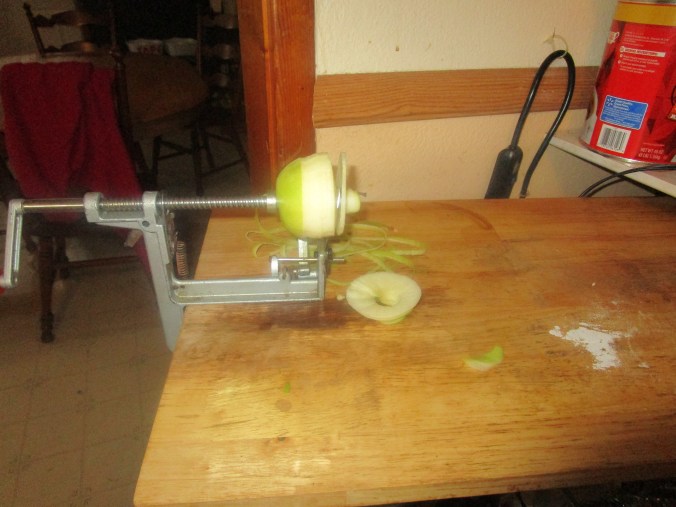
Love this apple corer/peeler/slicer!

Making the apple butter was an all day thing, because it needed to be in the crock pot for a total of ten hours. The first hour on high, the last hour with an open lid, and the eight hours between closed and on low. You can imagine how good it smelled. Anyway, it was supposed to make three pints. Well, it didn’t quite. It was more like two and and three quarters, so I canned two pints and left the third one open in the fridge. Ed and I had some with left over biscuits this morning for breakfast. Yeah, this is a keeper recipe.

IMG_0872

after the first hour

IMG_0875

All done!

Next came the apple sauce. Again, I found an online recipe. So, this morning, Chicken Girl ran five pounds of apples through the peeler. It took a little longer because the apples are beginning to spoil, so we had to go through a few bad ones. Sometimes, you can’t tell they’re bad until you cut into them, or until the corer gets stuck and you realize the core is no longer solid. Yuck. Anyway, back in the crock pot. This time on high for three hours. Again, the house filled with the smell of apples and cinnamon.
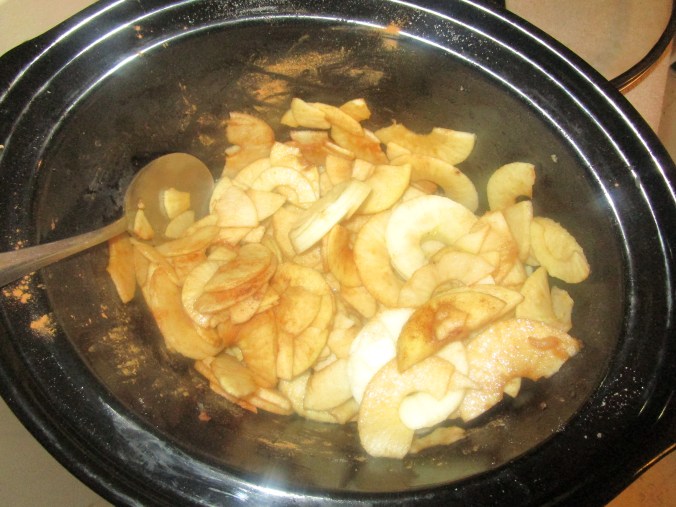
IMG_0877

Ready to cook

At the end of three hours, I opened the crock pot and took a look. Then I used a potato masher to mash the cooked apples and poured it into a glass bowl. Isn’t it pretty?

IMG_0882

Apple Sauce

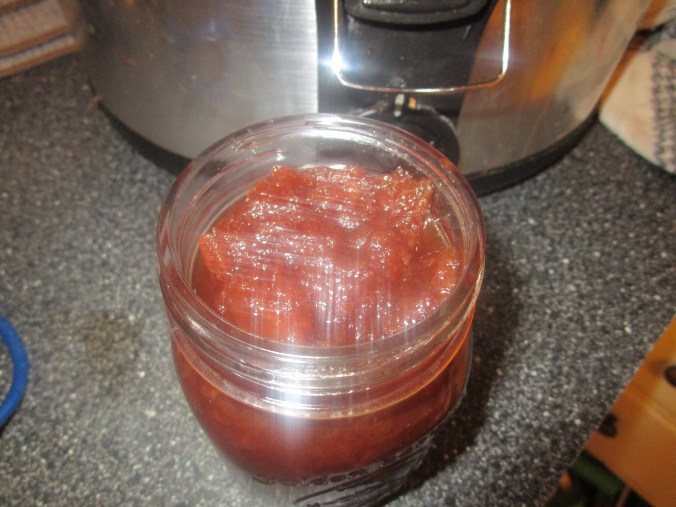
It’s good too. It’s a little tart, which is ok with me. Ed liked it better than the apple butter and I did too. Like Bam Bam, he thought the pear butter was “ok”. I don’t. It tastes scorched to me. Looking at the jars side by side, you can see how much darker the pear butter is than the apple butter (the pear butter jars have labels).

IMG_0883

See how much darker the pear butter is?

Oh, and as for Chicken Girl? She won’t taste any of it. She only likes fresh apples. Once they’re cooked, she won’t touch them.

My thought for now is to see how many of the remaining apples I can save and turn them all into apple sauce.

What is your experience with preserving the harvest?

Connie

Swarm Trapping

If you were raised “up in ‘dem hills” as I was, you are familiar with traps; leg traps, snares, box traps (rabbit gums or boxes). Later on, I learned about Quick Kill traps when trying to catch beavers. Someday I might do a post on the subject, though I am not involved in it at present.

I want to talk about Swarm Trapping.

In my last post I talked about the life cycle of a hive. If the hive thrives, there will come a point where there is a swarm. This is how bee hives multiply. So what we are looking at is not like trapping say, Muskrats, because your aim is not to end up with a pelt, but with a hive producing honey and bees for you. So we are going to set out to lure the swarming bees into our new home for them. If there is any relationship to pelt or meat trapping, it would be to the rabbit box or gum if you will.

RabbitGum-23

Basic picture of a Rabbit Trap or Rabbit Gum

A little disclaimer here, I have never actually done this. I plan to set my first traps next spring, so I am kind of using you guys for a sounding board to see how my research has gone, and if my plans hold water.

So here goes. What is a Swarm Trap? A Swarm Trap is a box. For the sake of reference, it has about the internal dimensions of a deep hive box, which is a little over 43 liters or 1.5 to 2 square feet. My original plan was to use my two old school Nuc Boxes for my initial traps, but they are only 1.2 square feet internal dimension. I need to do so some more research to see if that will work. If not, I will use a spare deep box or build my own.

beetrap

This is a Swarm Trap as sold by Crooked Hill Beekeeping

If you intend to build a swarm trap, you need to know more than I can put in this short blog post. I would suggest that you do some online research. I found an interesting article on the subject here. I may decide just to buy a couple, My friend Bill George, at Crooked Hill Beekeeping, will sell one he made for about thirty-five bucks last time I checked.

One thing I have heard from everyone is the more your Swarm Trap smells like bees, the more likely you are to have success with it. If you start with a newly built trap you will need to add some propolis and wax to the inside along with some Lemon Grass Oil which mimics the smell of a queen.

Once you have your traps ready then you need to put them up in a tree or trees. There is a reason that most plans for swarm traps are taller and thinner than the normal shape of a large hive box. This type of box is easier to carry under one arm and easier to secure in the crotch of a limb, with some tie down straps or ropes. The traps and the tie downs must be able to stand up to severe weather. Expect them to be there awhile, and have to endure thunderstorms and other bad weather, and still be in the tree when you get back.

At some point, we hope the scouts for a swarm prepared hive will find our swarm trap, go inside through about a two square inch opening, and find everything warm and dry with the smell of bee’s wax and propolis. We expect them to find around 2 square feet of space and maybe some frames to give them something to work with. Then we want them to go back and tell the potential swarm what they have found, and lead the Queen and all her little flying subjects to our Swarm Trap.

Checking our traps at least every third week, we hope to find bees inhabiting our swarm trap and happily building up their new hive. Then we would need to get our ladder, go back up the tree, close the entrance to our trap, get it down from the tree. I think we might be needing a length of rope and maybe even a small pulley set up at this point. I do not relish attempting to climb down a ladder carrying a box of rather perturbed bees under one arm. Once we get them back home I would suggest we let them settle in for a couple of days before making the final transfer into a regular 10 or 8 frame hive box.

As I have said many times before, and now remind you, I am learning on the go and trying to share what I learned.  I suggest that you read the article I referenced earlier in this blog post not only for how to make swarm traps and trap wild bees but also about natural beekeeping and its overall positive effects on the environment. Next year I am going to move to some more natural methods of beekeeping that are mentioned in this article and try to help reestablish a more healthy honey bee population in this area.

This is the end of the series of posts about how to increase your number of hives. On that subject, I have a lead on an old house that is “slap full” of bees. The man who told me about them said that they could not get near them during the summer. If everything works out and I can get permission from the owner I will try to go get them in the spring.

Another aside: If you raise bees, two of your greatest enemies are hive beetles and wax moths. The good news is they are controllable and they are fairly easy to trap. With the hive beetle,s you set the traps in the hive to catch them using a hive beetle trap, which will also catch the larvae of the wax moths.

IMG_0654

This is the Hive Beetle Traps we use. They are inexpensive and, if you ask those dead beetles in there, they are effective.

However, for the adult moths you set your traps outside the hive in the surrounding trees. You can look this up on line, but these traps can be built as simply as using a plastic coke bottle. When I finish one, I will post a picture.

Here is the recipe for bait for both kinds of traps. I made it and accidentally left an open container sitting on the work bench in my garage overnight. The next afternoon I found it and it was full of moths. Yeah, it seems to work pretty well.

½ cup apple cider vinegar.

¼ cup of sugar.

1 cup of water

1 ripe banana peel diced fine.

Mix the ingredients in a closed container (I used a pint fruit jar) and let ferment for 3 week. Strain out the banana peels and set up your traps.

Ed

Soaked Oatmeal

Yeah, you read that right: soaked oatmeal.

There is a school of thought that says the reason so many people have digestive problems and do not tolerate grains is that we do not prepare them properly. Proper preparation includes soaking them before we cook them. It can’t hurt, right? I mean, we soak dry beans before we cook them, don’t we?

I found this recipe for soaked oatmeal in Sally Fallon’s Nourishing Traditions, but I have quadrupled the recipe so that we have leftovers. I do that because another recipe in the same book calls for leftover oatmeal to make what you could call oatmeal pancakes, and they are awesome!

Anyway, I take four cups of old fashioned oats, four cups of warm water, a half a cup of buttermilk (you can use apple cider vinegar if you can’t handle dairy), mix it up, cover it and leave it to sit at room temperature for at least seven hours. I usually let it sit over night.

IMG_0848

I think I took this picture the night before, right after I mixed it up. It doesn’t look like it’s been soaking.

The next morning, I put another four cups of water, two teaspoons of salt and a heaping teaspoon of cinnamon in a large pot. The recipe doesn’t call for the cinnamon, but we like it. Bring the water to a boil. You can also add nuts and raisins or other dried fruit. I didn’t do it this time because I didn’t have any, but normally I do.

IMG_0849

Simmering water, salt and cinnamon.

Once the water starts to boil, add your soaked oatmeal, and stir. Let it cook about five minutes, stirring occasionally. That’s it. I usually add a couple sticks of butter and let it melt in. Since we all have different tastes about sweetness, every one fixes their own bowl and then adds whatever sweetener they want. This makes a lot. Ed, Bam Bam, and I can eat this for at least two days and still have enough left to make a batch of oatmeal cakes. Chicken girl won’t touch oatmeal, no matter how it’s fixed.

IMG_0851

Stirring in the soaked oats.

IMG_0853

Yummy!

I’ve been making oatmeal this way for over a year now, and I couldn’t tell you one way or the other if its effect our digestion, but I can tell you we like it. A few months ago, I hadn’t soaked any the night before. I needed something quick for Bam Bam and I, so I just made it like it says on the box. We both decided that we didn’t like it nearly as well as we did the soaked.

If you try it, let me know what you think. If you want a smaller batch, divide the recipe by four. One cup oats, one cup water, two tablespoons buttermilk for soaking, then one cup water and a half teaspoon salt for the next morning.

In other homestead news:

We are nearly out of the drought, thank the Lord! We are now at level D0 which is “abnormally dry”. Last week we had nearly ten inches of rain, which lead to flooding and road closures. Our creeks are running full again.

1009180918a

You can see what it looked like before here

This morning, a full ten days earlier than our “average frost date”, we had a hard freeze. We woke to find the pastures white with frost. The growing season is officially over. A few days ago, when I heard this was coming, I harvested all the herbs I could and took the potted plants I wanted to save back into the greenhouse. I also picked all the green tomatoes that were big enough to fool with. The plants were still blooming, as was the watermelon, volunteer pumpkin, and one of the blackberry bushes . There were some enormous green berries on it. Alas, they are no more.

Once it warmed up a little, I went out and looked at the wild grapes, since you are supposed to pick them after the first frost. What little I found is quite a ways over my head. So I don’t know if I will get those or not. I did however get this picture. Pretty isn’t it?

IMG_0861

butterfly on mulberry tree

I’m not sure what Ed has in store for you next week, so you’ll just have to come back and see.

Have a great week!

Connie

Fifty/Fifty Making the Split

A short, very simplistic, primer on the life of a bee hive:

Step One: Bees come from somewhere: swarm, bought or split and begin making a hive.

Step Two: Queen does a mating flight and begins making baby bees (called brood) and we hope a whole bunch of them.

Step Three: All the bees work together to fill the hive space with brood and food and lots of bees.

IMG_0658

Not yet ready for splitting but a pretty good example of a healthy hive headed in that direction.

Step Four: Oops we got too many bees.

Step Five: If they have not already bees begin making Queen Cells.

Step Six: New Queen is born, old Queen take about half the hive and moves out, this is called a swarm.

Step Seven: See step one.

And that is how bees increase, ask somebody else about birds.

So today I am going to talk for a little while about how bee keepers control this natural cycle to make certain they keep their bees. It is called Swarm Management and Hive Splitting. The point is to catch the hive somewhere around Step Four and intervene before the Swarm Instinct has taken hold. Then you artificially split the hive so as to make two hives out of it.

We have a hive and man ain’t we proud of it. This hive is strong, well populated, clean and busy as…. well….. bees. You may be weeks or even days from a swarm. Bee hives reproduce themselves by swarming. It is a natural occurrence in a strong hive that is growing. Sooner or later part of the hive will break off, move and reestablish itself as a separate hive. What we want to do is control that instinct by moving them ourselves before the Swarm Instinct kicks in because once the girls start the process they will get it done.

If you want to be technical there are several viable ways to split hives. So far I have tried and succeeded at one way and that is what I am going to talk about. A disclaimer. Succeeded is defined as, they were alive and doing well day before yesterday when I looked. If all my writing on the subject has taught you or me nothing else it is that things can happen very fast in bee world.

If you want more information on Swarm Management and Splitting Hives I suggest you read starting on page 69 in your copy of First Lessons In Beekeeping or check out this.

We had one hive out of two make it through the winter. That was my goal for year one and this was year two. No plan survives initial contact. But I was happy about it and, further, the hive was strong and well populated. In May, after some discussion and research we split the hive. There are other ways and I will probably try a few of them if given an opportunity next spring but here is what we did.

First, we isolated the laying Queen for a little over a week. We did this by putting a Queen Excluder between the two deep hive boxes. It does not really matter whether Her Majesty is working in the top or the bottom box because now we have her where she can only lay in one box. By finding the box with uncapped brood in it we find where the Lady is laying.

queenex

This is a Queen Excluder. Her Highness is bigger than the other bees and this keeps her on one side of the excluder.

When we checked we found two good things, there was uncapped brood in the bottom box which meant she was there, and there were Queen Cells in the top box. Russian bees have a habit of keeping “just in case” queen cells ready. If the queen is still viable she will not let them hatch. If not, or if it is time to swarm, she will. So we took the top box, placed it on a bottom, put a top piece on it, closed the front and we had the start of a new hive.

Next step, we separated the split from the original hive by about four miles. Two would have done nicely but four was the best we could do over two miles. Why two miles? A bee can travel up to a mile an a half from her hive, find something she wants like pollen, water or maybe her old hive, go back to where she came from and communicate these directions to her hive mates. Yeah, me too. That’s amazing. I worked with U. S. Army trained Reconnaissance Scouts who could not tell you the way to the latrine.

So we got the ladies more than two miles away and set them up in a pasture with already blooming clover, plenty of nearby water and other blooming plants all about. Then we waited. The split hive needed to stay away from the original hive at least two weeks. During that time I visited every couple of days and checked the feeders and the general condition of the bees. Both them and the original hive seemed to be doing well.

Lets talk Queens. You can buy a Queen and place her in your split hive. That will cut your delay on getting fresh brood by one to two weeks. What we did was just split them and let nature take its course. Depending on whether you have Queen Cells in your split and what condition they are in the delay to get a new Queen is going to be one to a little over two weeks. Then you have a one week delay while she is bred. Then you have a two week delay until your brood begins to hatch.

That is why it is important to have capped brood in your split and that is why your split will be behind your original hive no matter what you do. We got less than half the honey out of our split as we did the original but they had made and do have plenty for winter.

Oh, an oddity. Russian bees are normally pretty calm and not the least aggressive compared to most bees. For whatever reason these ladies are kind of “‘ttudenal” and will sting you right now. Hopefully they will get over it but I swear they are still mad at me about the split.

Ed

Baking Bread

Welcome to the homestead kitchen, where we specialize in cooking from scratch, and using real food. Today we’re going to talk about bread. There is nothing quite like the smell of baking bread to bring people from all parts of the house to the kitchen with anticipatory smiles on their faces. Ask me how I know.

I also know the idea of baking bread can be intimidating, but don’t let it scare you too much. We’re going to have some fun!

There are two basic types of bread: Quick Breads and Yeast Breads.

Quick breads use baking powder and/or baking soda as a leavening agent. Biscuits, pancakes, cornbread, and nut breads are examples of quick breads. Today, specifically, we’re going to talk about biscuits.

When I was twelve years old, I started visiting my dad and step mom in Georgia during the summer. My step mom, Dot, is a traditional southern cook, and her fried chicken and buttermilk biscuits are to die for. I watched her, in fascination, as she formed each biscuit by hand (without a biscuit cutter), leaving a pan of biscuits that looked like they came out of a machine, but tasted like they came out of heaven.

It was years before I actually tackled it myself, and no, mine don’t look like hers. None of my bread is “pretty”. It just isn’t. I must not hold my mouth right or something. It does however, taste good.

Baking powder biscuits just need a few things: flour, salt, baking powder and a liquid. If your liquid is butter milk, you will also need baking soda. Dot always used self rising flour, which has the leavening included, but I don’t. I use plain white flour, and sometimes, if it’s in the budget, I’ll use some whole wheat or spelt flour too.

So, let’s get started shall we?

First, we need flour. I’m using four cups of all purpose flour, to which I will add two teaspoons of salt, four teaspoons of baking powder and a half teaspoon of baking soda. I use a whisk to mix it all together.

IMG_0837

Whisk the dry ingredients together

Then I add a cup of shortening. You can use whatever solid shortening you have on hand. Today I used what was left from some Crisco that I had for something else. Usually, I stay away from vegetable shortening because I don’t think it’s good for you, but I had it and I needed to use it up. Otherwise I would use butter or lard. I mix it in with a pastry blender until it looks like course crumbs .

IMG_0838

Adding the shortening

Next comes the buttermilk. The recipe would call for two cups, but it really depends on your flour, so I start with one and a half cups and add more if I need it. Mix well.

IMG_0839

this was still a little dry so I added more buttermilk

Now, you need to put your dough out on a floured surface. I use newspapers, because it cuts down on the mess. I can just roll it up and throw it away when I’m finished. You can roll the dough out with a rolling pin or pat it out by hand. You can use a biscuit cutter and cut them out, or you can pinch off pieces and roll them between your hands. I do the latter.

IMG_0840

my floured surface

Put your rolled pieces on a greased baking sheet, sides touching.

IMG_0841

ready to go

Bake in a 400 degree oven for about 20 minutes or until brown on the top.

IMG_0842

Ready to eat!

See, they aren’t pretty, but they sure were good! There were only two left after breakfast, and all four of us were home for breakfast.

Baking bread can seem like a daunting undertaking, but don’t let that put you off. Like many things, it just takes some practice. My great grandma Marie said of her bread making experience. “My neighbor asked me, ‘How’d your bread turn out Marie?’ I said, ‘right out there in that trash can!’” Grandma didn’t give up though and by the time I came along she was an experienced bread baker. When I was about 13, after what seems like months of begging, she finally agreed to teach me how to make the bread she only made for family get togethers at fourth of July, Thanksgiving and Christmas.

Yeast Breads use yeast as a leavening agent. The yeast can come from a package or from the air as it does with sourdough bread. I haven’t mastered sourdough bread yet, so we won’t cover that today. I’ll keep working on it though and I’ll share what I’ve learned with you when I do. I buy my yeast at the store. Since I make a lot of it, I buy it in jars instead of the little envelopes.

Yeast breads really only need yeast, flour and a liquid, but if you want it to have a nice texture and taste you need to add a few more things, like shortening and salt. You can add sugar and eggs too, depending on what kind of yeast bread you’re making. Yeast bread recipes can also be used to make rolls and cinnamon rolls.

The bread that I make on a weekly basis actually comes from the book “A Cabin Full of Food”, by Marie Beausoleil at Just Plain Living, so I’m not going to actually share a recipe for yeast bread, but I will show you the basics that apply to any type of yeast bread baking.

One thing I do that is different is that I use a bread bowl. I found this one in a flea market several years ago. It saves a lot of the mess of having that “floured surface” on your table or counter, because you can knead your bread right in the bowl.
IMG_0823

Ok, the first thing you have to do is get your liquid hot enough to melt your shortening. If you’re using water, that means boil it. Liquid can be water, milk, potato water, and probably a few other things I haven’t thought of. Your shortening can be oil, butter, vegetable shortening, lard, and a combination of those things. Grandma’s bread used both butter and vegetable shortening. Like her, I only make that at the holidays.

IMG_0824

This is a half stick of butter. I just wanted to give you an idea of the size of this bowl.

IMG_0825

boiling water and butter

Then you have to let the liquid cool to luke warm. 105 degrees is what you’re looking for so you can add the yeast. You want the little yeasts to be cozy. Dried yeast is actually a dormant bacteria. When you put it in the warm water it wakes up. If the water is too cool, they take too long, and if it’s too hot, they die. So it has to be “just right”. It will feel just barely warm to the touch. Now at this stage, you can also add some sugar, or other natural sweetener. If you do, let it sit for about five minutes before you do anything else. That gives the yeast a chance to get good and awake, and start eating the sugar. You’ll know they’re working because your liquid will start to look bubbly.

IMG_0826

bubble bubble

Now stir in your flour and any other ingredients. You want a sticky looking dough. This is called the sponge. You can let the dough rest for 30 minutes to an hour at this point.

Now comes the fun part. You want to put your dough out on a floured work surface, or add flour to your bread bowl.

IMG_0844

flour in the bowl with the sponge

You want to work in enough flour to where the dough is smooth and elastic. You do this by pressing down on the dough, folding it over, and pressing down again. When it sticks to the work surface or your hands, you add more flour. Kneading like this can take anywhere between eight and fifteen minutes. You cannot over knead. Grandma always said you have to let the bread know who’s the boss!

IMG_0845

All kneaded

Some recipes may have you let the dough rise until double at this point, before you do anything else (like my grandma’s recipe) or it might have you form the bread into loaves and put it into greased pans before you let it rise. If you put it in pans you will only have one rising before you bake it.

IMG_0846

Ready to Rise

IMG_0847

Ready to Bake

After the dough has risen, you bake it in a 350 degree oven for about 40 minutes or so, until the tops are golden brown and they sound hollow when you tap the bottoms.

I didn’t get a picture when they came out of the oven. This was taken later after the first loaf was already gone.

IMG_0832

All baked. 

Well, I hope I haven’t scared you off too badly, and I do hope you try your hand at baking bread.

Connie

Wild About Wild Bees Part 3

So we are at the last of a three part series on our taking a bee hive out of an abandon house adventure. Let me give you the big spoiler. Before the end of summer we lost the hive to wax moths. What are wax moths you ask? This tells you better than I can.

IMG_0810

This is what brood comb looks like after a visit from wax moth larvae.

Essentially they are a moth whose larvae burrows through the wax and eats the pollen and brood destroying the hive. A strong hive can control and defeat wax moths and there in lay our problem. When we brought the bees home, we likely brought the wax moths with us. We also reduced the bee population, caused a break in the birth cycle of the bees, and led to a situation where the moths could overcome the weakened hive.

Another time in my life where I learned from my mistakes, but another suffered for them. I always regret that, but at least it is even more motivation to not make the same mistake again. So let me do an after action review and tell you what we will do differently next time the opportunity presents itself.

I will do a reconnaissance of the site before we go out to it. This is another one of those things where I did not transfer general experience from my past into a new thing I am doing in the present. I KNOW that, given an opportunity, you do not go into an unknown situation without first seeing the objective. Had I done that, I would have had a much better idea of what I had to bring.

I will obtain and take a vacuum cleaner with adjustable suction with me and, if available, with battery power. This would have been essential to gather up even half of the bees present.

I will take more hive boxes than I believe I need. I thought I did that this time, but I was way over matched on equipment to transport the bees.

I will start earlier in the day. First because I have learned that bees are more docile early in the morning or late in the evening, and second for the sake of coolness.

Since this is short I will end with a little photo essay of our last couple visits to the girls. We came away with about thirty pounds of honey from one hive but the other two, who got a later start, have not capped everything else so I will check them again next week.

The reasons the other two hives, though strong, are behind is that they started with less, being a new hive and a split, and this awful drought we have suffered.

We are getting to the point where we are going to have to prep for winter so next week will be the dead line.

IMG_0742

I have always loved honey in the comb. To do that you have to set the frame up without any foundation in it. You insert a couple of Popsicle sticks in the groves where the foundation goes and stick them with wax. The bees do the rest. I did one frame a hive.

IMG_0745

One of the reasons my no foundation frame did not work last year was Her Highness got up in the Super and laid brood in it. What you are looking at is a Queen Excluder.  Because Milady is bigger than the other bees she cannot fit through.

IMG_0746

This is interesting. In one of the deeps I guess I forgot to put in a frame. Think that stopped the girls? No way, they just made comb and honey anyway.

IMG_0760

BEES!!! I do not believe the ladies are very happy with me.

IMG_0757

That look of pain on my face has nothing to do with the bees except their added weight. A deep hive box full of brood and honey is HEAVY.  Did I mention how old I am?

Ed


Repurposing on the Homestead

Y’all know I like junk, and I’m all about using what I have to make do.

Well, ever since we moved here four years ago (after I recovered from my accident), I’ve wanted a spot out in the detached garage to work on repurposing projects that were either too big, or too dirty to bring into the house.  At the same time, I had an idea for creating a table that would rotate, using some stuff we had out in the barn.

Well, about a month ago, we finally got the garage cleaned out enough for me to have my spot.  Since then, had been been moving stuff out there, and realized again, that I really needed a table. From the other times Ed and I (and Number One Son) had discussed it, I also knew that I needed a piece of plywood to join the two pieces from the barn. Extra plywood is not in the budget right now.

Well, a couple days ago, I was doing something totally unrelated in the house (I don’t even remember what it was), when suddenly, I remembered I had a piece of plywood that would probably work. To be honest, when something hits me like that, I’m not taking credit. That has to be the Lord.   Anyway, I used to do cake decorating many years ago, and I used pieces of plywood as supports for larger cakes. I knew I still had one left, I just had to remember where I put it. Thankfully, it didn’t take long to find, and I showed it to Ed to see if he thought it would work. He did.

I think it was later that day that he and I went to the barn to gather the other materials. One was a round table top, and the other was the base from a swivel bar stool.  The table top was from a bunch of stuff that was given away after a yard sale. The bar stool base was here when we moved in.

Anyway, putting the whole thing together took about 15 minutes and didn’t cost us anything. We already had the necessary screws too.  I should say that the table top is actually particle board, so I don’t expect it to last forever, but it will do for what I need for now, and I’m thankful for it.

IMG_0777

Ed attaching the plywood to the table top

Looking at what remains of stenciled lettering on the plywood that I used for a cake base, I remembered where it came from. It’s from a sign that was made for a cub scouting event when my boys were in cub scouts, so it’s probably about twenty-two years old.  I got the board not too long after that. I stopped doing cakes like that about 19 years ago. Yeah, I don’t throw much away.

IMG_0776

close up of the plywood

Here is a picture of the bar stool base. You’ll notice the bee hive supers in the back ground. Ed had painted them and they were drying.  Further back in the picture are some old computers that Bam Bam is taking apart.  I’ll probably get whats left when he gets what he wants out of  them.

IMG_0778

bar stool base

There are holes in the base for screwing on the seat that will work perfectly for screwing it onto the table.

IMG_0779

See the holes at the ends of the cross bars?

IMG_0780

attaching the base. Notice the vitamin bottle on the work bench next to the table top? Those are great for keeping small screws.

IMG_0783

All done!

I have to tell you that I kept wondering about the pictures I was taking in the garage. It seemed like they were a little out of focus, or light was coming from someplace that I wasn’t accounting for. However, after taking pictures this morning, I realized what it was. There was something on the lens (Duh). Probably honey from the pictures I took out at the hives last week.

Here’s a picture of the table that I took this morning. I’ve been using it for about a week now.  It’s all ready for the next repurposing project!

IMG_0790

Ready to play!

Next week, Ed will bring you more about our bees. We should have our honey harvest done by then too. We’re also working on posts about the chickens and their new coop, and I’m working on some stuff for the “homestead kitchen”.

Come back and see us!

Connie

Wild about Wild Bees: Part Two of Three Parts

So the last we spoke, Connie and I were beginning to, for the first time, try to pull wild bees out of the walls of a dilapidated old house that was soon to be torn down. You can find all that here.

The house was lathe and plaster walled and there was no electricity in it. Good luck as much as good planning, my sawzal was battery powered, and yes I had brought extra batteries. But where, exactly are the bees? I had proven that they were as far down the wall as two foot or so from the floor and as far up the wall as at least six feet. What about side to side.

IMG_0491

This is the wall I will be working with. In the video you will see a two foot wide swath cut out from floor to ceiling and all of it full of hive.

As we faced the wall, to the left was limited by the window sill and the necessary framing that would go with it. From prior experience, I knew most houses were framed at two feet on center. Experimentally I went looking for some framing at two feet from the window and found a two by four there.

Now I had a box that went from at least the ceiling to the floor and was two feet wide. That seemed like a natural place to find the hive so, between the two foot up and six feet up, I made a cut just inside and searching for the framing two by four. Once I found it I cut open a small area.

That was when I began to get a hint of how amazed I was about to be. I took my small pry bar and a hammer and began to pull back the lathe and plaster wall. There was no need to be overly neat because they were going to tear the house down anyway. First I went up from the two foot mark to the six foot.

Between the two by fours spaced two feet on center packed as deep as it could go and all of the four feet length there was hive. That would be about twenty inches wide and four inches deep by four feet long or about two and a quarter cubic feet of hive and brood just covered with bees.

That would be the ones that were not on me.

And that as not all of it. Over a period of time we uncovered up closer to the ceiling and  from the two foot point to about a foot under the floor. All of it was filled with hive starting with the oldest near the entrance hole and the newest nearer the ceiling. Here, let me see if I can show you:

I have a reaction when I come into close contact with God’s magnificent engineering and actions in nature or in man. First I am awed of course. Next I am strangely happy, almost childishly so. Some kind of “I just knew you were there God.” moment. Then I am simply humbled by the works of God. Add to that the fact that we were hopelessly over matched today.

So when you cannot do it all you do the best you can. Finding the Queen by any normal means would have be pretty near impossible, most of the comb was empty because it was early spring and there was very little honey.

Connie and I decided to get all the brood comb we could find and put that in the hive box which we had brought. Suddenly the bees began to quit attacking us and settled back into the comb with some coming and voluntarily landing in the box. We gathered as much as we could, sealed the box and put it in the truck.

Nine countable stings and one box of bees with way too many left behind, we were on the way home. Already we, both of us being veterans, were A. A. R’ing the whole thing. (After Action Reviewing). As we rode home and drank water. We both agreed we would do better next time.

In part three I will talk about our AAR and the ultimate outcome of our first attempt. If any apiarist who have something add reads this, please feel free to critique me in comments. I have had my faults explained to me by Drill Sergeants, you will not hurt my feelings and you may help me and the bees next time.


Late Summer Foraging and Plant ID

Officially, we are still at D4-Exceptional drought levels, but we did get some significant rain this last week. Depending on who you ask, we got somewhere between four and seven inches. Thank you Lord for that!

In my last post, I said that I had seen some different “weeds” this summer probably due to the drought. Maybe when the less drought tolerant plants don’t make it, room is left for these guys. Anyway, it’s always exciting to see new stuff.

Speaking of new stuff. Someone in the wild edible Facebook page I belong to, told me about this phone app called Picture This. When you come across a plant you don’t recognize, you can take take a picture of it, and the app will try to identify it. Most of the time, it gives you a few possibilities, with the first one most likely. If nothing else,  that means you have a place to start from. I’ve been having a great time playing with it!

This cannot be said often enough: If you do not know, with 100% certainty, what a plant is, don’t eat it! It could be fine, or it could kill you. By the way, all the pictures in this post were taken with either my camera or my phone.  With one exception, they were all taken somewhere on our place.

This is spurge. You DON’T want to eat it. It will give you a bad stomach ache and all the nasty stuff that goes along with that.

xs_1533764768413_resized

spurge

This however, is purslane, and it is good for you.

xs_1534437112912

purslane

Here is a very good blog post with some good pictures that can give you more detailed info about the two. For me, purslane leaves look shiny and rubbery like succulents. They often grow close together, so once you know the difference, it’s pretty easy to tell them apart. An interesting side note is that, often edible plants and their poisonous look alikes grow close together. Another look alike for spurge (and as far I know this isn’t edible either) is knot weed. This grows all over my yard. I think makes great ground cover. I would like it better if it was edible.

0904181033_resized

knot weed

When we got rid of the giant ragweed last spring, this came up in its place. It’s called “Lambs Quarters, or Pig Weed or Wild Spinach…anyway. You can eat it. It’s a cousin to amaranth. As a matter of fact, several years ago, when we lived in Independence, I planted some amaranth. When it came up, my ex-husband saw it and asked me why I planted pig weed.

IMG_0698

pig weed

Taking a walk with Ed the other day, we came across these. Yep. Elderberries. They are along the road, and I don’t know if they were sprayed (although they probably weren’t), so we didn’t pick any. You gotta be careful with roadside finds for that reason. Many places want to get rid of the “weeds” along the road, so they spray poison. You don’t want to eat that! We’ve lost some of our own elderberry bushes this summer, while others seem to be doing very well. It well be a few years before ours produce anything though.

IMG_0705

elderberries

This is sumac. No this isn’t the poison sumac. The berries and seeds are edible. Green Deane at Eat the Weeds has a great article about sumac. Going to have to play with this one if I can get to it. Taking the picture was kind of a challenge.

xs_1534855565259_resized (2)

Sumac bush. You can see a  cluster of fruit/seeds in the center of the picture and another one off to the right.

This is milk weed. Butterflies love it, but the leaves are poisonous for us. The Spruce  has some good information about milk weed, including the fact that caterpillars can eat the poisonous leaves and thrive, while becoming poisonous themselves to any potential predator.

IMG_0719

milk weed and guest

This is pepper grass. It’s growing out in front of our detached garage. I had to hold my camera down at ground level in order to get a decent picture. The leaves have a peppery taste, and the seeds can be ground and used like black pepper. Green Deane says the roots mixed with vinegar makes a great horseradish substitute. Ed and Bam Bam would love that. Chicken girl and I, not so much. You all know I’m going to have to play with it anyway, right?

0904181038a_resized (1)

pepper  grass growing in the gravel

This stuff is growing everywhere around the house. It’s called Hornbeam Copperleaf, and as of yet, I can find no good use for it. If you do, let me know.

xs_1534532469397_resized

hornbeam copperleaf

These were out in the dog pen. Don’t know enough about fungi to even venture a guess. I did ask about it, and couldn’t get a definitive answer, so we pulled them up and disposed of them. Don’t think the dogs would eat them, but you never know with Meeko. He eats ragweed leaves.

0824181730

Some kind of fungi. Notice the spurge at the bottom of the picture

This is…yes, it’s corn. We didn’t plant it. It’s out where the chicken pen was a few years ago, so we figure those were some seeds the chickens didn’t get. Don’t really expect it to do anything, but we’ll see. Morning glories are coming up around it. Talk about invasive! Morning glories are the worst! Even if they are pretty.

IMG_0699

Corn. See the morning glories kind of circled behind it?

This is called a hummingbird vine. Someone had to have planted it, because it originates in Mexico and South America.  It’s invasive too. It’s pretty, but it’s unruly. Good thing I like the wild look huh. Still if it gets too wild, I’ll have to cut it back.

xs_1536077803919_resized

hummingbird vine

The wild cherries are gone as far as I can tell, but the grapes are hanging in. xs_1534532720530_resized

We have a ton of juniper berries, but still don’t know what to do with them besides making gin and I’m not doing that.

IMG_0720

juniper berries

Of course we still have plantain, dandelion, chicory, mallow, and goldenrod.

0904181037_resized

goldenrod

Remember when we were talking about mint and I said that it’s super invasive and that’s why a lot of people don’t plant it directly in the ground? Well, I guess it doesn’t do well in drought, because I only have about three stalks of mint in my yard and they didn’t get very big. Maybe it will come back now that we have some water.

0904181114_resized

What’s left of my mint.

For the second year in a row, we have a volunteer pumpkin growing under the maple tree in the front yard. It starts so late that it won’t be big enough before it gets cold. At least it wasn’t last year.

0904181036_resized

volunteer pumpkin blooming

Next week, Ed we’ll be back to tell you more about our experience with the wild hive. It was awesome!

Hey, if you like our blog, please share the love with your friends!

Have a great week!

Connie

Wild about Wild Bees Part One of Three Parts

A friend contacted me about a friend of his who was tearing down a house that was full of wild honey bees. Did I want to try to get them out?

Time and money are limited commodities. Let me promise you that I have much more time than money. So when I am offered the opportunity to put together a bee hive for a little bit of work, I am right there to do it.

I said, “Absolutely”. Then set out to learn how to do it. The first rule of learning anything new is that it is never as simple as you might believe. The second rule is that it is never as complicated as those who are trying to tell you how to do it make it out to be.

When I learn about electricity I really do not know it until I get shocked. Probably more than once. Most of my life has been fly by the seat of my pants experience and, beside the seat getting a little threadbare, I see no reason to stop now.

So what did I do?

1. I contacted people who knew something about what I was going to do to ask for their advice. Never turn down free advice, it is at least worth what you paid for it. What I learned from this is that you are essentially pulling the hive, comb, brood, honey (if any) and bees out and taking it with you. Easier said than done. One piece of advice I ignored was to use a vacuum with a variable or low setting to gather up the bees. I will do that next time.

One thing I learned which made me delay the whole procedure was not to try moving a hive too early in the spring because they were still weak from winter so I talked to the owner and he agreed to wait about a month.

Also, I learned that pulling a hive of bees out of a dwelling or tree has a pretty low success rate even for experienced beekeepers.

2. I read about it. The two reference books I reach for most are First Lessons in Beekeeping by Keith S. Delaplane (in the tradition of C. D. Dadant’s 1917 original) and Homegrown Honey Bees by Alethea Morrison. There are others, that might be better, but these work for me.

3. Yes, I went on YouTube. Who doesn’t? If you find yourself needing to do kitchen table brain surgery I suggest you check YouTube. They probably have a video about that. So I watched the videos I could find and learned what I could.

There is an old military saying, “Amateurs study tactics and strategy while professionals study logistics.” That is because no matter how well you plan you must have what you need when you get there or you cannot complete the mission. So we checked and double checked what we took with us.

First, of course, something to put the bees in, I took one deep hive box and, just to be certain, a Nuc Box. Also, safety equipment for two people. Second, this was an old house so I would need to get into the wall that would require a saw (I took two; one battery operated sawzall and one  hand saw), two different styles of pry bar, and basic carpentry tools.

I did not know if I was going to go in from the outside or the inside. My “plan” was to work from the inside but the situation would dictate which way I went.

So Connie and I went over our list, tried to assure we had everything and I loaded the truck the night before because, military again, nobody ever gave me extra duty for getting there early.

The next morning we got in the truck and, thanks to Google, got there without any trouble. Here comes another old military adage referred to as Murphy’s First Law of Combat which says, “No plan survives initial contact with the enemy.”

The house was a very dilapidated old structure. My guess would be late 19th or early 20th century frame house with one and a half stories. Approaching the house, even in my two wheeled drive truck, was no issue because the owner had cut a rough track in with some form of tractor.

IMG_0481

Looks pretty rough right? That window back there is our only viable entrance. 

IMG_0482

Here is another view. Bet this was a really nice house back when I was a kid. 

After we got parked and before we prepared to approach the bees, we did a little reconnaissance around the house where we found an old hand pump well and, just up and right of it about two and a half feet up the outside of the house, the bee’s entrance. So, from the window above the well, the entrance was two feet left and two and a half feet up from the floor. Easy enough to find from the inside.

IMG_0484

That brown spot on the wall there, that is the bee’s entrance. Beside it is an old well pump and well which I am surprised Connie did not make me take with us. 

IMG_0483

The entrance when we got there. 

IMG_0485

Now it is cleared enough to get in and out and I am getting equipment inside. 

Next, we reconned the way in and out. We were looking at a floor strewn with junk, broken glass, old furniture, etc. Our entry was through a broken out window. More glass, more junk. So my next job was to make certain we had a clear path in and out as best I could because we were going to have to step over that window sill no matter what.

I did all this with Connie’s help and we still were not suited up for the bees because they seemed not very concerned about our human foolishness. Having cleared everything that we could out of our way and having moved our necessary gear into the room we got ready and entered “suited, booted and ready for war”.

We went into the room and found the walls were lathe and plaster: a process of finishing walls and ceilings used up until the late 1950s. This might make things a tad harder, but I had a sawsall with two batteries. I was good on that. There were no bees flying around inside the house but there were a lot of dead bees in the window sill to the left of where we were working.

IMG_0491

There are bees in that wall. We had no idea how many. 

The first thing I did was experimentally drive a nail puller into the wall above my head to see how sturdy it all was. The nail puller drove into the wall but the wall seemed fairly sturdy. So I found and marked the spot inside the was about where the bees were coming in and out outside then I started preparing the sawzall to do a little work when I noticed that I now had bees flying around my head.


So where did they come from? I looked around the room then Connie pointed up. My knock with the nail puller had been a bit more productive than I thought. Bees were pouring out of the hole I made and were not the least bit amused.

So it begins.