The Long, Hard, Winter

It’s been a rough winter for us on the homestead. As Ed told you, we lost all our bees. By the way, thank all of you who offered him so much encouragement. We really appreciate it. He has decided that if we can make it through some financial difficulties, he will try again.

So, yes, we’ve had some financial difficulties, which we aren’t through yet (prayers always appreciated), and we’ve had some health issues as well. The health issues have mostly been mine, and I’m still trying to work through all that. The doctors can’t quite figure out what’s wrong, although they have some guesses (prayers appreciated there too).

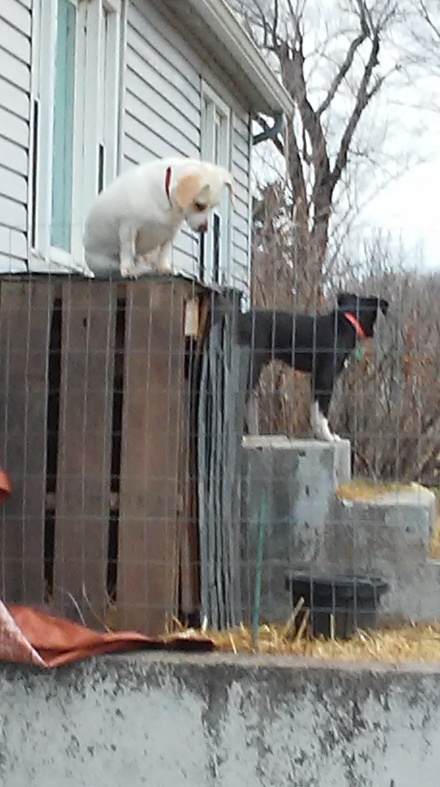
Weather-wise, it has been a cold, wet winter. I have no idea how much snow and rain we’ve had altogether, but the well is overflowing. Remember that drought last summer? Yeah, we’re over that.

0312191700_resized

As you can see, the water is actually out of the well and climbing the cinder block.

In addition to the wet, the bitter cold presented its own challenges. There were several days where the temperature was below zero, and that was without the wind. From what I understand, the local kids have missed at least fifteen days of school due to bad weather.

0114191024_Burst01_resized (2)

Part of the elm tree on the garage and chicken tractor. Thankfully, the rest of the tree is still standing

0114191032_resized (1)

Our car stuck sideways in our driveway

When we finally had some pretty days, Sunny Rooster couldn’t wait to free range himself. Unfortunately, he got out one time too many, and all we found was feathers. Chicken Girl is inconsolable. We put all the chickens back in the big coop. One of Moony’s hens decided she liked laying eggs back in her old coop, so she was getting out too. Praying she’ll get over that. Don’t think Chicken Girl could take losing another one so soon.

The coop renovations never got finished last fall. With all the water, some of the posts started to shift, so it looks like we may have to scrap that idea and start over. Whatever we do, it needs to be soon so we can keep any independent chickens from leaving the coop.

A neighbor, who has veterinary experience, gave our chickens some medicine for the mites. They will probably need to be treated again though. She said the coop will need to be scrubbed out because they live in the wood. One more reason for a new coop.

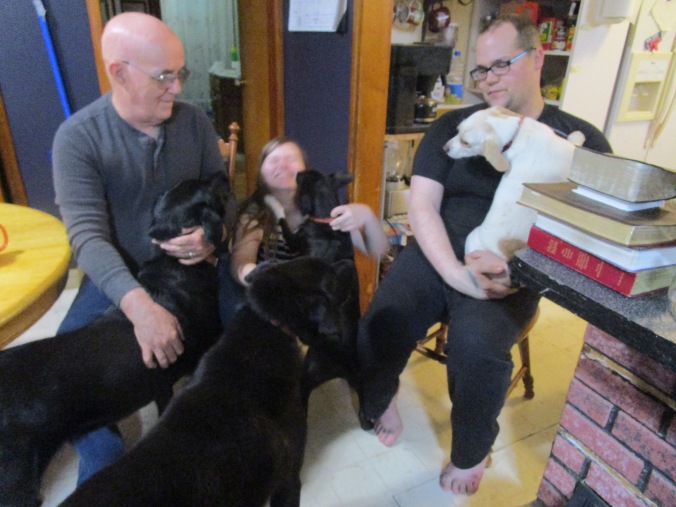
This picture is from a few weeks ago. Chicken Girl noticed that one of Moony’s claws was curling back into his skin, so she decided to clip it. I don’t know what Bookworm was doing. Supervising?

0201190840_resized

Chicken Girl, Moony and Bookworm

On a lighter note, Libby is doing very well and has gained all her weight back. She still has no bowel control, but it’s solid so we can quickly clean it up. She’s obviously feeling better, except for some arthritis, and often plays with the other dogs. Both Gracie and Rex enjoy playing with her, but I think Meeko is a little jealous of “his” Libby.

0112191052_resized

Libby and Gracie

For some reason, Meeko and Rex, who were both neutered as puppies, have decided they need to mark the house. We don’t know if it’s a dominance thing or an anxiety thing. Regardless of the reason, we need to do a deep scrubbing to make sure they aren’t just coming back the odor, which they can smell a hundred times better than we can. Great. One more thing.

Recently, I had two pleasant surprises that fell right in line with my wanting to “learn it all.” The homestead blogging network that I follow but don’t belong to had a giveaway of the introductory course from The Herbal Academy of New England. I entered but didn’t think any more about it. (I enter things all the time). I was shocked when they emailed me that I had won. So, yes now, I am working through that course, and yes, I’ll be sharing some of that info with you.

The four herb pots that I put in the basement greenhouse for winter are doing very well. The smell of rosemary and lavender is wonderful inside that little enclosure. I should have done it already, but soon, I will get some seeds started. Not sure how much we really want to do this year, but I do have a few herbs that I definitely want to start, so I’ll share that as soon as I do it.

The other surprise was discovering that there is someone here in Braymer who weaves and spins. After I told her of my interest, she invited me to a group of people who are big into fiber arts, so yes, I am learning there too. Got my first left-handed knitting lesson last week, and got to play with a spinning wheel. I need a LOT of practice. So expect to hear more about that too.

Ed has a new series of posts that he is working on that he’ll start sharing with you next week. In the meanwhile, I’m working on my own set of “make your own” posts.

Connie

Christmas on the Homestead

Twas the night before Christmas and all through the house,
You could hear me grumble, mumble and grouse.

The socks on the mantle were no longer there,
The cats had taken them, only heaven knows where

The children were screaming and wrecking their beds
Playing games with VR sets strapped to their heads

While Connie was yelling and raising a flap
So Meeko would stop trying to get on her lap

The whole scene was crazy: mad as a hatter
if something else happened well what could it matter

Four dogs barked and ran for the door
Then Meeko stopped and peed on the floor

I opened the door in the new fallen snow
to see Sunny the Rooster free ranging below

When suddenly I jumped straight up in fear
As Meeko ran howling with a cat on each ear.

And grumpy old Libby, still lively and quick
was chewing on cookies meant for St Nick.

You call them pets but they were worse than a flame
stampedes of destruction their favorite game.

Out Libby, Out Meeko, out Gracie and Rex
You cats better cool it or you will be next!

To the top of the dog house, over looking the wall
Get back here Gracie, before you fall!1224181520c (1)

All our papers and pens had learned how to fly
When Bookworm was clearing a place for to lie.1224181713 (1)

And Christmas cards strewn all over the floor
Where Captain had left them as she went out the door

Out in the chicken coop, as the snow flew
Chicken Girl chastised a chicken or two

No one is laying, not Noya or Ren
Not one single egg from one single hen.

Connie was wanting to put up the tree
But feared that Meeko would drown it in pee

And Rex would fight Gracie for each Christmas treat
and Libby would chew shoes off everyone’s feet

So we jarred up some honey to spread Christmas cheer
Giving thanks bees hibernate this time of year

Bam Bam came home from his day on the job
letting back in the wild canine mob.IMG_0934

Meeko destroyed a third of the house,
but still couldn’t catch that pesky gray mouse.

And Libby, so old, came in the door last
but an expert at mayhem, she’s catching up fast.

Harley and Adora, the crab and the cat
stay to themselves as they eat and get fat

Of course you spilled flour when making bread
but how did you get it on all the dog’s heads?

Through all this mess, we smile and recall
It’s Jesus’ birthday, and He saved us all.

It’s not about presents or recalcitrant pets
It doesn’t matter what anyone gets.

The GIFT that was given that first Christmas Day
Didn’t come from an elf or ride on a sleigh

It came directly from God’s righteous hand,
The gift of salvation from heaven to man.

And our final message with out all the jokes
Merry Christmas to all from the homestead old folks

Ed and Connie

A Slow Week on the Homestead

Sometimes with homesteading, as with any other kind of lifestyle, you have a slow week; a week where there isn’t much happening. For us, this has been one of those weeks.

The weather has given us a break, the dogs have settled down into the new routine (as have we), and I’m trying to decide just how much I want to do for Christmas.

1212181047.jpg

Gracie thinks she’s Snoopy.

My friend Mary Lue, gave me some of her sour dough starter. From what I understand, it’s been around for a long time. Anyway, I’ve been playing with it some, and today I have bread rising. I also experimented with a sour dough donut recipe. Since I don’t have a donut cutter, I just used a pizza cutter and cut the dough into squares. They were good. You can find the recipe here.

IMG_0910

Starting the 8 hour slow rise.

IMG_0911

These were good! Even Chicken Girl liked them!

Since it was such a nice day, I decided to go outside for awhile, and like almost every other time I go out, Sunny Rooster greeted me. He is our self proclaimed free range rooster. He goes in and out of his pen whenever he feels like it. The hens could too, but they don’t.

IMG_0902

You’ll notice that Sunny is outside the pen and the girls are inside.

Once we get the coop completely finished, we’ll be able to put both groups in it, but right now. Moony and his girls are still in the little coop, which is fully winterized at this point.

IMG_0906

The big coop: A continuing work in progress.

IMG_0907

The winterized little coop, that has definitely seen better days. 

I told Chicken Girl to come out with me, and we would let Moony’s bunch out for a bit.  They probably stayed out a total of fifteen minutes, and then they decided to go back in.  Moony has all his feathers back after his last molting. Isn’t he gorgeous?

IMG_0914

Moony and the girls enjoying some free range time.

IMG_0917

Moony Rooster

Unfortunately, we are still fighting a mite infestation.  Every time we think we’re done with them, they come back, so I am looking at some different treatment options.

Like I said, it’s been a quiet week on the homestead. I’m sure that can’t last long!

Connie

Winter Came Early

The last few years, we haven’t had much of a winter. Last year, we had a week or two of some frigid temperatures, but we never had any snow to speak of.  By the middle of summer, as I wrote about here, we were in a serious drought.

Since we haven’t had a “good” winter in a few years, we felt like this was going to be the year, and some of the winter forecasts agreed. As I wrote in my last post, we have already had some cold temperatures. Well, this last week, winter came early.  Friday evening, we were under a “Winter Weather Advisory”. By Saturday morning, that changed to a “Winter Weather Warning”, and by Saturday afternoon, we were under a “Blizzard Warning”.   It started with rain about nine Sunday morning. By 11, it was turning to sleet, and our church dismissed early.  It was all snow by noon, and done by about 9 in the evening. We probably had somewhere around eight inches or so, but it was hard to tell because the wind caused so much drifting, we had some places that were bare, and others that were eighteen inches deep.

Ed got this amazing picture on Monday. He shared it on his personal Facebook page, but I wanted to share it here too. The sun was behind him, and he literally could not see what was in the camera viewfinder. He just aimed in a general direction and took the picture.

IMG_20181126_081748694.jpg

Ed captured his own shadow

IMG_20181126_081735100

This one is a little to the left of the other one. Look at the weight of the snow on the juniper tree in the center of the shot.

Now, for an update on Libby. The vet informed me yesterday, that it could take a couple of months for her to get control of her bowels again. Wonderful. So while it is no longer runny, it is still coming out whenever and wherever it wants to. We were giving her two showers daily, but now, we’re down to one every few days. As long as she doesn’t lay in it, she’s good.

Last week, when it was warm, she really enjoyed being outside, so I decided (since it was nice and warm), to get a new pen built sooner rather than later. Yes, sometimes I do get the bit in my teeth, much to the consternation of the rest of my family. That being said, we now have a small pen built off the front of the house, with plans to double the size of it this spring. All the dogs can go out, and stay out for as long as they want without us having to worry about them. We used all the experience we had from all our past pen building failures to make this one right the first time.  The area is also small enough that I can go out and clean it daily, keeping track of who is doing what. Yeah, I can tell, for the most part, whose is whose. You all were wondering about that, weren’t you. If you have dogs, you know just what I mean.

Most of the time, they go out, do their business, and come back in. Libby would rather be out, so to provide some temporary shelter, I put her old dog crate out there and fixed a tarp over it. Ed started taking the old dog house apart, with plans to use at least some of it for the new one. Then came the Blizzard Warning, and the whole thing became a rush job. Ed was working, so Bam Bam got the job. Chicken Girl and I helped as best we could. When it was done, it was large enough to hold all four dogs, and give them all room to move around. Then we put a whole bale of straw inside.

Saturday night, Libby would not come back in. Meeko was torn at first, but decided to stay out with her. Since the weather wasn’t bad yet, I let them stay out there. I knew I would be able to hear them if they needed back in. I didn’t hear a peep out of either one of them until I called them back in Sunday morning.

Yesterday, they all went out for awhile, and I took this picture.

IMG_0899

New pen and new dog house.

I was concerned about all four dogs being in the house, as well as in a small pen, together, and there have been some tense moments, but I think everyone is starting to relax…even the cats. One of them left a mouse in front of my bedroom chair last night. Thanks guys!

On the chicken front, there are still some mite issues. Chicken Girl brought one of the hens in the other day to dust her. All the other chickens are fine, so we are kind of concerned about her over all health, because we know a weaker chicken is more susceptible to secondary infestations.   Meeko was very interested, but he kept his distance. Ed clobbering him with the last one he killed may have finally got the message across.

IMG_0894

Meeko trying hard to be good.

Next week, Ed is planning to continue his firearm series, with a post about hand guns.

Connie

Vanishing Bees, Constipated Dogs, and Mite Infested Chickens: Reality on the Homestead

I’m pretty sure that after four years of reading our blog (If you’ve managed to hang with us that long), you know that this is not one of those that paint a wonderful, rosy picture of homesteading. We would be lying if we did that, and the Lord frowns on lying (among other things).

So you share in our successes, and more often you share in our failures. We hope you can learn from our mistakes and not make the same ones. If nothing else, it might give you a good laugh.

To us, however, this particular post isn’t funny, but it is an example of how quickly things go can wrong, and how bad they can get if you don’t get ahead of them just as quickly.

First, a couple weeks ago, Ed went out to set fresh hive beetle traps and check on all the bees. I was working at my computer, and Ed came in and said that two of the hives are gone. At first, I thought he meant they were dead, and my mind raced to figure out how that could have happened so quickly without us noticing something. Then, I realized he meant they were gone, like swarmed, only we really aren’t sure if that is what happened either.  The two hives in question were the ones  sitting closest together: the original hive that we split last summer, and the nuc that we bought last spring. The split hive, sitting out in the pasture, is still intact. I imagine that Ed will want to write about all that, but it may take him a few weeks to process it. It’s hit him pretty hard.

Then, Monday morning, Chicken Girl came back in from letting the chickens out, carrying a hen with her. She said the feathers around her vent were completely gone, and as she turned the hen around to show me, she gasped and said, “She has mites!” (Oh wonderful.) I told her to take the hen out to the garage and I would bring out the diatomaceous earth.

We have had unseasonably cold weather this week. We’ve had temperatures dip down into the single digits and we’ve even had some snow. That is more like late December and January weather for us, not early to mid November. Monday morning, it was cold and snowing. That’s why I told her to go to the garage. It’s not heated, but it would be out of the wind. So we dusted that hen with the DE, and then we examined the other three in that coop. One more had some, but the others didn’t. We treated them anyway. This morning, Chicken Girl told me she thought the mites were gone, but she’s going to keep a better eye on it. The chickens in the little coop were fine, but Chicken Girl is worried about moving them to the big coop once we get it finished.

Now, for the true highlight of the month. As you know, we have our big dogs, Meeko and Libby, outside in a large enclosure. You know this because we have written several posts about the seeming impossibility of keeping them in it. Two years ago, we reduced it in size by half, which actually put them farther away from the house. We go out to feed, water, and spend time with them twice a day, and were taking them out for a walk with us about once a week. However, once Bam Bam moved back in with the little dogs, the walks became problematic, and we hadn’t done it in awhile.

Libby has always been rather aloof. She isn’t crazy about being handled unless it’s her idea, and it’s hardly ever her idea. Add that to the fact that Meeko is a big attention hog. Getting past him to get to her is a challenge. OK, it’s nearly impossible without someone else distracting him.

Libby is also one of those dogs that gets a thick, heavy undercoat in the winter, and then spends all of spring and summer getting rid of it. By fall, when it’s time for her to coat back up, she looks semi emaciated, but it’s just that she’s lost all that hair.

Well, A few weeks ago, I noticed that Libby’s winter coat didn’t seem to be coming in. She looked even more thin than usual. She was eating the little bit of canned food we give them every morning (in case we have to sneak some medicine), but it didn’t look like she was eating a lot of dry food. We were trying to watch that anyway because she has worn her teeth down pretty far, and we wanted to make sure she could still eat the dry food. That being said, she was still taking dog biscuits from us and seemed to be chewing those just fine.

I wanted to get my hands on her, so I told Ed to get hold of Meeko. I was shocked. She felt like skin and bones. Later that day, I brought both dogs in the house and started watching what she was doing. I thought she might not be getting enough to eat and gave her a whole can of food, putting her in Ed’s office so that she could eat with out having to fight off the other dogs. She didn’t touch it. That was Thursday afternoon (Nov 1). By Friday, I realized that not only was she not eating, she wasn’t pooping. Thinking I might have to have her put to sleep, I called our regular vet. They were swamped and couldn’t get her in until the following week. I didn’t think she could wait, so I found another vet, and got her in that afternoon.

The diagnosis? She was constipated. No, she was Constipated. Her colon was completely full and it was backed up into her small intestine. She had lost 15 lbs! I don’t need to tell you how we felt, do I? The vet did tell us that her blood work looked great. Other than the obvious problem, she is in good shape.

So the vet gave us laxatives and instructions for the weekend, and told us to call her back on Monday. Since part of the laxative regimen required miralax in her drinking water, we couldn’t let the other dogs get access to it. So we confined Libby to our bedroom. Meeko did not like that at all.

Meeko at the door

Meeko moping outside our bedroom door.

Monday nothing had changed, so we took her back. That was Monday, November 5th. She got to stay with the vet for a week, and we brought her home Monday November 12th. (The same Monday Chicken Girl discovered the mites). We did go visit her on Friday the 9th. They had a cone on her to keep her from pulling the IV port out. They took it off for our visit and told us to watch her because she’s quick (like we don’t know that!).

1109181137a

Visiting Day: She was not happy.

When she came home, she was mostly cleaned out (I won’t give you all the details…yes, thank me), but they want her to stay on all the laxatives until Thursday. Then they will tell us how to start backing them off. The good news is that she obviously feels better, she’s eating and she is no longer constipated. However, thanks to the laxatives, she has no control over her bowels. Oh, and her weight had dropped to 50 lbs for a total loss of 22 lbs!

We cannot put her back outside because one, she has neither fat, nor winter undercoat, and it is cold, and two, we have to watch her to see how things are moving. We can see it alright. We can smell it too. We’ve already given her four showers to help keep her clean (yeah, she loves that), and are in a constant state of washing towels and blankets.

IMG_20181114_095519987

After her bath this morning, she was shivering, so I put a blanket over her. She seemed to like it.

Oh, did I forget to mention the bill? $2365.00! That blew what little budget we had, and we had to remind ourselves that the Lord is our provider. We do the best we can and leave the rest to Him.

Don’t be too surprised if, in the next few months, we write a post about building in new dog pen right off the house, probably utilizing the front door. Also, I imagine Ed will want to tell you about what it was like living with Meeko in the house for a week, without Libby.

However, I think for next week, he might be continuing his series on firearms. He probably needs to get his mind of his missing bees, and cleaning up after a dog with free flowing bowels.

Connie


Preserving the Harvest

The reason for having a garden is not only to have fresh fruit and vegetables in the summer, but also to preserve them for the winter months. That can be done by canning, drying or freezing. This year, we didn’t have much of a garden so we didn’t have anything to put up, except for a few herbs that I am drying.  That is about the limit of my drying experience: herbs. My preferred method of preserving is canning although I’m still a novice and have a lot of learning to do. I save freezing for shorter term preservation.

As you know, we planted fruit trees last spring, and while they are all doing well, it will be at least three or four years before they produce any fruit. However, I am getting some preserving the harvest practice in this year because I was given several pounds of pears and granny smith apples.

IMG_0863

img_0865.jpg

Pears are funny things. They do not ripen on the tree. They fall off and then ripen. You have to catch them quick because the window between green and rotten is very small. So what did I do with thirty pounds of pears in varying stages of ripeness? I made an enormous batch of pear butter. Let me just say in advance, that it wasn’t a good idea.

I used the pear butter recipe in the Ball Canning book. It called for pounds of pears per recipe and gives the approximate yields in pints (this is also where I rediscovered that my water bath canner is only large enough for pint jars) One recipe makes about four pints. First it says to peel and core the fruit. So Chicken Girl and I did that. We had to take a couple breaks to wash our hands and the knives because, if you didn’t know, peeling pears is a sticky mess.

Anyway, we filled my largest stock pot with pears. Then I was supposed to add some water and cook it until the pears were soft…um some of the pears were already soft…Then I needed to use a food mill or a food processor to make pulp, being careful not to liquefy it. A food mill is on my wish list, (and would have been a much better choice) but you use what you have right?

IMG_0866

Yeah, it’s full. Not a good idea.

Then I was supposed to measure out two quarts of pulp per batch. I had six quarts so that is three batches…but I started with thirty pounds of pears which was five batches? Fine, three batches it is.

So I added the sugar and spices and put it all back in the stock pot. I was supposed to cook it down until thick, stirring occasionally to keep from sticking. What it did not say (anywhere in the book..I looked) was that this cooking has to be done on LOW and takes a long time (like hours). I had my fire too high and even stirring constantly, I could feel it sticking. What do do. I turned it off and went to look online for more information…Yeah low and hours…oh look there…crock pot! Yes! I have crock pots

So I pulled out both my crock pots and filled them. The bottom of my stock pot had thick black gunk stuck to the bottom that we are still trying to get out. My take from that is that I tried to cook too much at once over too hot a fire, in a pot with too thin a bottom.

Anyway, I left it all in the crock pot overnight. And canned it the next day. I ended up with twelve pints. I’m not impressed with it. Bam Bam said he thought it was ok, but then Bam Bam really likes pears.

As for the apples, learning from the pear butter experience, I went a little different route. First I made an apple pie (I don’t do home made pie crusts very well, but I wanted to give Chicken Girl the experience..she doesn’t do them well either). The pie tasted good, but it wasn’t very pretty. Then I came across a recipe for fresh apple cake. That was so good it was gone in about a day. Unfortunately, I didn’t get pictures of either.

Of course, I had to try apple sauce and apple butter, but only one batch at a time. If I could do that, then I would do more. I found recipes for both that used the crock pot. I’ll try the old fashioned way again, when I have better cooking pots.

I did apple butter first. I found the recipe here. So we peeled and cored the apples. I’ve had this little device for years, and I can’t tell you how much I love it. It pretty much does everything for you. Even if you need to chop them up more finely, it’s easy to do with them already peeled, cored and sliced.

IMG_0876

Love this apple corer/peeler/slicer!

Making the apple butter was an all day thing, because it needed to be in the crock pot for a total of ten hours. The first hour on high, the last hour with an open lid, and the eight hours between closed and on low. You can imagine how good it smelled. Anyway, it was supposed to make three pints. Well, it didn’t quite. It was more like two and and three quarters, so I canned two pints and left the third one open in the fridge. Ed and I had some with left over biscuits this morning for breakfast. Yeah, this is a keeper recipe.

IMG_0872

after the first hour

IMG_0875

All done!

Next came the apple sauce. Again, I found an online recipe. So, this morning, Chicken Girl ran five pounds of apples through the peeler. It took a little longer because the apples are beginning to spoil, so we had to go through a few bad ones. Sometimes, you can’t tell they’re bad until you cut into them, or until the corer gets stuck and you realize the core is no longer solid. Yuck. Anyway, back in the crock pot. This time on high for three hours. Again, the house filled with the smell of apples and cinnamon.

IMG_0877

Ready to cook

At the end of three hours, I opened the crock pot and took a look. Then I used a potato masher to mash the cooked apples and poured it into a glass bowl. Isn’t it pretty?

IMG_0882

Apple Sauce

It’s good too. It’s a little tart, which is ok with me. Ed liked it better than the apple butter and I did too. Like Bam Bam, he thought the pear butter was “ok”. I don’t. It tastes scorched to me. Looking at the jars side by side, you can see how much darker the pear butter is than the apple butter (the pear butter jars have labels).

IMG_0883

See how much darker the pear butter is?

Oh, and as for Chicken Girl? She won’t taste any of it. She only likes fresh apples. Once they’re cooked, she won’t touch them.

My thought for now is to see how many of the remaining apples I can save and turn them all into apple sauce.

What is your experience with preserving the harvest?

Connie

Soaked Oatmeal

Yeah, you read that right: soaked oatmeal.

There is a school of thought that says the reason so many people have digestive problems and do not tolerate grains is that we do not prepare them properly. Proper preparation includes soaking them before we cook them. It can’t hurt, right? I mean, we soak dry beans before we cook them, don’t we?

I found this recipe for soaked oatmeal in Sally Fallon’s Nourishing Traditions, but I have quadrupled the recipe so that we have leftovers. I do that because another recipe in the same book calls for leftover oatmeal to make what you could call oatmeal pancakes, and they are awesome!

Anyway, I take four cups of old fashioned oats, four cups of warm water, a half a cup of buttermilk (you can use apple cider vinegar if you can’t handle dairy), mix it up, cover it and leave it to sit at room temperature for at least seven hours. I usually let it sit over night.

IMG_0848

I think I took this picture the night before, right after I mixed it up. It doesn’t look like it’s been soaking.

The next morning, I put another four cups of water, two teaspoons of salt and a heaping teaspoon of cinnamon in a large pot. The recipe doesn’t call for the cinnamon, but we like it. Bring the water to a boil. You can also add nuts and raisins or other dried fruit. I didn’t do it this time because I didn’t have any, but normally I do.

IMG_0849

Simmering water, salt and cinnamon.

Once the water starts to boil, add your soaked oatmeal, and stir. Let it cook about five minutes, stirring occasionally. That’s it. I usually add a couple sticks of butter and let it melt in. Since we all have different tastes about sweetness, every one fixes their own bowl and then adds whatever sweetener they want. This makes a lot. Ed, Bam Bam, and I can eat this for at least two days and still have enough left to make a batch of oatmeal cakes. Chicken girl won’t touch oatmeal, no matter how it’s fixed.

IMG_0851

Stirring in the soaked oats.

IMG_0853

Yummy!

I’ve been making oatmeal this way for over a year now, and I couldn’t tell you one way or the other if its effect our digestion, but I can tell you we like it. A few months ago, I hadn’t soaked any the night before. I needed something quick for Bam Bam and I, so I just made it like it says on the box. We both decided that we didn’t like it nearly as well as we did the soaked.

If you try it, let me know what you think. If you want a smaller batch, divide the recipe by four. One cup oats, one cup water, two tablespoons buttermilk for soaking, then one cup water and a half teaspoon salt for the next morning.

In other homestead news:

We are nearly out of the drought, thank the Lord! We are now at level D0 which is “abnormally dry”. Last week we had nearly ten inches of rain, which lead to flooding and road closures. Our creeks are running full again.

1009180918a

You can see what it looked like before here

This morning, a full ten days earlier than our “average frost date”, we had a hard freeze. We woke to find the pastures white with frost. The growing season is officially over. A few days ago, when I heard this was coming, I harvested all the herbs I could and took the potted plants I wanted to save back into the greenhouse. I also picked all the green tomatoes that were big enough to fool with. The plants were still blooming, as was the watermelon, volunteer pumpkin, and one of the blackberry bushes . There were some enormous green berries on it. Alas, they are no more.

Once it warmed up a little, I went out and looked at the wild grapes, since you are supposed to pick them after the first frost. What little I found is quite a ways over my head. So I don’t know if I will get those or not. I did however get this picture. Pretty isn’t it?

IMG_0861

butterfly on mulberry tree

I’m not sure what Ed has in store for you next week, so you’ll just have to come back and see.

Have a great week!

Connie

Baking Bread

Welcome to the homestead kitchen, where we specialize in cooking from scratch, and using real food. Today we’re going to talk about bread. There is nothing quite like the smell of baking bread to bring people from all parts of the house to the kitchen with anticipatory smiles on their faces. Ask me how I know.

I also know the idea of baking bread can be intimidating, but don’t let it scare you too much. We’re going to have some fun!

There are two basic types of bread: Quick Breads and Yeast Breads.

Quick breads use baking powder and/or baking soda as a leavening agent. Biscuits, pancakes, cornbread, and nut breads are examples of quick breads. Today, specifically, we’re going to talk about biscuits.

When I was twelve years old, I started visiting my dad and step mom in Georgia during the summer. My step mom, Dot, is a traditional southern cook, and her fried chicken and buttermilk biscuits are to die for. I watched her, in fascination, as she formed each biscuit by hand (without a biscuit cutter), leaving a pan of biscuits that looked like they came out of a machine, but tasted like they came out of heaven.

It was years before I actually tackled it myself, and no, mine don’t look like hers. None of my bread is “pretty”. It just isn’t. I must not hold my mouth right or something. It does however, taste good.

Baking powder biscuits just need a few things: flour, salt, baking powder and a liquid. If your liquid is butter milk, you will also need baking soda. Dot always used self rising flour, which has the leavening included, but I don’t. I use plain white flour, and sometimes, if it’s in the budget, I’ll use some whole wheat or spelt flour too.

So, let’s get started shall we?

First, we need flour. I’m using four cups of all purpose flour, to which I will add two teaspoons of salt, four teaspoons of baking powder and a half teaspoon of baking soda. I use a whisk to mix it all together.

IMG_0837

Whisk the dry ingredients together

Then I add a cup of shortening. You can use whatever solid shortening you have on hand. Today I used what was left from some Crisco that I had for something else. Usually, I stay away from vegetable shortening because I don’t think it’s good for you, but I had it and I needed to use it up. Otherwise I would use butter or lard. I mix it in with a pastry blender until it looks like course crumbs .

IMG_0838

Adding the shortening

Next comes the buttermilk. The recipe would call for two cups, but it really depends on your flour, so I start with one and a half cups and add more if I need it. Mix well.

IMG_0839

this was still a little dry so I added more buttermilk

Now, you need to put your dough out on a floured surface. I use newspapers, because it cuts down on the mess. I can just roll it up and throw it away when I’m finished. You can roll the dough out with a rolling pin or pat it out by hand. You can use a biscuit cutter and cut them out, or you can pinch off pieces and roll them between your hands. I do the latter.

IMG_0840

my floured surface

Put your rolled pieces on a greased baking sheet, sides touching.

IMG_0841

ready to go

Bake in a 400 degree oven for about 20 minutes or until brown on the top.

IMG_0842

Ready to eat!

See, they aren’t pretty, but they sure were good! There were only two left after breakfast, and all four of us were home for breakfast.

Baking bread can seem like a daunting undertaking, but don’t let that put you off. Like many things, it just takes some practice. My great grandma Marie said of her bread making experience. “My neighbor asked me, ‘How’d your bread turn out Marie?’ I said, ‘right out there in that trash can!’” Grandma didn’t give up though and by the time I came along she was an experienced bread baker. When I was about 13, after what seems like months of begging, she finally agreed to teach me how to make the bread she only made for family get togethers at fourth of July, Thanksgiving and Christmas.

Yeast Breads use yeast as a leavening agent. The yeast can come from a package or from the air as it does with sourdough bread. I haven’t mastered sourdough bread yet, so we won’t cover that today. I’ll keep working on it though and I’ll share what I’ve learned with you when I do. I buy my yeast at the store. Since I make a lot of it, I buy it in jars instead of the little envelopes.

Yeast breads really only need yeast, flour and a liquid, but if you want it to have a nice texture and taste you need to add a few more things, like shortening and salt. You can add sugar and eggs too, depending on what kind of yeast bread you’re making. Yeast bread recipes can also be used to make rolls and cinnamon rolls.

The bread that I make on a weekly basis actually comes from the book “A Cabin Full of Food”, by Marie Beausoleil at Just Plain Living, so I’m not going to actually share a recipe for yeast bread, but I will show you the basics that apply to any type of yeast bread baking.

One thing I do that is different is that I use a bread bowl. I found this one in a flea market several years ago. It saves a lot of the mess of having that “floured surface” on your table or counter, because you can knead your bread right in the bowl.
IMG_0823

Ok, the first thing you have to do is get your liquid hot enough to melt your shortening. If you’re using water, that means boil it. Liquid can be water, milk, potato water, and probably a few other things I haven’t thought of. Your shortening can be oil, butter, vegetable shortening, lard, and a combination of those things. Grandma’s bread used both butter and vegetable shortening. Like her, I only make that at the holidays.

IMG_0824

This is a half stick of butter. I just wanted to give you an idea of the size of this bowl.

IMG_0825

boiling water and butter

Then you have to let the liquid cool to luke warm. 105 degrees is what you’re looking for so you can add the yeast. You want the little yeasts to be cozy. Dried yeast is actually a dormant bacteria. When you put it in the warm water it wakes up. If the water is too cool, they take too long, and if it’s too hot, they die. So it has to be “just right”. It will feel just barely warm to the touch. Now at this stage, you can also add some sugar, or other natural sweetener. If you do, let it sit for about five minutes before you do anything else. That gives the yeast a chance to get good and awake, and start eating the sugar. You’ll know they’re working because your liquid will start to look bubbly.

IMG_0826

bubble bubble

Now stir in your flour and any other ingredients. You want a sticky looking dough. This is called the sponge. You can let the dough rest for 30 minutes to an hour at this point.

Now comes the fun part. You want to put your dough out on a floured work surface, or add flour to your bread bowl.

IMG_0844

flour in the bowl with the sponge

You want to work in enough flour to where the dough is smooth and elastic. You do this by pressing down on the dough, folding it over, and pressing down again. When it sticks to the work surface or your hands, you add more flour. Kneading like this can take anywhere between eight and fifteen minutes. You cannot over knead. Grandma always said you have to let the bread know who’s the boss!

IMG_0845

All kneaded

Some recipes may have you let the dough rise until double at this point, before you do anything else (like my grandma’s recipe) or it might have you form the bread into loaves and put it into greased pans before you let it rise. If you put it in pans you will only have one rising before you bake it.

IMG_0846

Ready to Rise

IMG_0847

Ready to Bake

After the dough has risen, you bake it in a 350 degree oven for about 40 minutes or so, until the tops are golden brown and they sound hollow when you tap the bottoms.

I didn’t get a picture when they came out of the oven. This was taken later after the first loaf was already gone.

IMG_0832

All baked. 

Well, I hope I haven’t scared you off too badly, and I do hope you try your hand at baking bread.

Connie

Repurposing on the Homestead

Y’all know I like junk, and I’m all about using what I have to make do.

Well, ever since we moved here four years ago (after I recovered from my accident), I’ve wanted a spot out in the detached garage to work on repurposing projects that were either too big, or too dirty to bring into the house.  At the same time, I had an idea for creating a table that would rotate, using some stuff we had out in the barn.

Well, about a month ago, we finally got the garage cleaned out enough for me to have my spot.  Since then, had been been moving stuff out there, and realized again, that I really needed a table. From the other times Ed and I (and Number One Son) had discussed it, I also knew that I needed a piece of plywood to join the two pieces from the barn. Extra plywood is not in the budget right now.

Well, a couple days ago, I was doing something totally unrelated in the house (I don’t even remember what it was), when suddenly, I remembered I had a piece of plywood that would probably work. To be honest, when something hits me like that, I’m not taking credit. That has to be the Lord.   Anyway, I used to do cake decorating many years ago, and I used pieces of plywood as supports for larger cakes. I knew I still had one left, I just had to remember where I put it. Thankfully, it didn’t take long to find, and I showed it to Ed to see if he thought it would work. He did.

I think it was later that day that he and I went to the barn to gather the other materials. One was a round table top, and the other was the base from a swivel bar stool.  The table top was from a bunch of stuff that was given away after a yard sale. The bar stool base was here when we moved in.

Anyway, putting the whole thing together took about 15 minutes and didn’t cost us anything. We already had the necessary screws too.  I should say that the table top is actually particle board, so I don’t expect it to last forever, but it will do for what I need for now, and I’m thankful for it.

IMG_0777

Ed attaching the plywood to the table top

Looking at what remains of stenciled lettering on the plywood that I used for a cake base, I remembered where it came from. It’s from a sign that was made for a cub scouting event when my boys were in cub scouts, so it’s probably about twenty-two years old.  I got the board not too long after that. I stopped doing cakes like that about 19 years ago. Yeah, I don’t throw much away.

IMG_0776

close up of the plywood

Here is a picture of the bar stool base. You’ll notice the bee hive supers in the back ground. Ed had painted them and they were drying.  Further back in the picture are some old computers that Bam Bam is taking apart.  I’ll probably get whats left when he gets what he wants out of  them.

IMG_0778

bar stool base

There are holes in the base for screwing on the seat that will work perfectly for screwing it onto the table.

IMG_0779

See the holes at the ends of the cross bars?

IMG_0780

attaching the base. Notice the vitamin bottle on the work bench next to the table top? Those are great for keeping small screws.

IMG_0783

All done!

I have to tell you that I kept wondering about the pictures I was taking in the garage. It seemed like they were a little out of focus, or light was coming from someplace that I wasn’t accounting for. However, after taking pictures this morning, I realized what it was. There was something on the lens (Duh). Probably honey from the pictures I took out at the hives last week.

Here’s a picture of the table that I took this morning. I’ve been using it for about a week now.  It’s all ready for the next repurposing project!

IMG_0790

Ready to play!

Next week, Ed will bring you more about our bees. We should have our honey harvest done by then too. We’re also working on posts about the chickens and their new coop, and I’m working on some stuff for the “homestead kitchen”.

Come back and see us!

Connie

Late Summer Foraging and Plant ID

Officially, we are still at D4-Exceptional drought levels, but we did get some significant rain this last week. Depending on who you ask, we got somewhere between four and seven inches. Thank you Lord for that!

In my last post, I said that I had seen some different “weeds” this summer probably due to the drought. Maybe when the less drought tolerant plants don’t make it, room is left for these guys. Anyway, it’s always exciting to see new stuff.

Speaking of new stuff. Someone in the wild edible Facebook page I belong to, told me about this phone app called Picture This. When you come across a plant you don’t recognize, you can take take a picture of it, and the app will try to identify it. Most of the time, it gives you a few possibilities, with the first one most likely. If nothing else,  that means you have a place to start from. I’ve been having a great time playing with it!

This cannot be said often enough: If you do not know, with 100% certainty, what a plant is, don’t eat it! It could be fine, or it could kill you. By the way, all the pictures in this post were taken with either my camera or my phone.  With one exception, they were all taken somewhere on our place.

This is spurge. You DON’T want to eat it. It will give you a bad stomach ache and all the nasty stuff that goes along with that.

xs_1533764768413_resized

spurge

This however, is purslane, and it is good for you.

xs_1534437112912

purslane

Here is a very good blog post with some good pictures that can give you more detailed info about the two. For me, purslane leaves look shiny and rubbery like succulents. They often grow close together, so once you know the difference, it’s pretty easy to tell them apart. An interesting side note is that, often edible plants and their poisonous look alikes grow close together. Another look alike for spurge (and as far I know this isn’t edible either) is knot weed. This grows all over my yard. I think makes great ground cover. I would like it better if it was edible.

0904181033_resized

knot weed

When we got rid of the giant ragweed last spring, this came up in its place. It’s called “Lambs Quarters, or Pig Weed or Wild Spinach…anyway. You can eat it. It’s a cousin to amaranth. As a matter of fact, several years ago, when we lived in Independence, I planted some amaranth. When it came up, my ex-husband saw it and asked me why I planted pig weed.

IMG_0698

pig weed

Taking a walk with Ed the other day, we came across these. Yep. Elderberries. They are along the road, and I don’t know if they were sprayed (although they probably weren’t), so we didn’t pick any. You gotta be careful with roadside finds for that reason. Many places want to get rid of the “weeds” along the road, so they spray poison. You don’t want to eat that! We’ve lost some of our own elderberry bushes this summer, while others seem to be doing very well. It well be a few years before ours produce anything though.

IMG_0705

elderberries

This is sumac. No this isn’t the poison sumac. The berries and seeds are edible. Green Deane at Eat the Weeds has a great article about sumac. Going to have to play with this one if I can get to it. Taking the picture was kind of a challenge.

xs_1534855565259_resized (2)

Sumac bush. You can see a  cluster of fruit/seeds in the center of the picture and another one off to the right.

This is milk weed. Butterflies love it, but the leaves are poisonous for us. The Spruce  has some good information about milk weed, including the fact that caterpillars can eat the poisonous leaves and thrive, while becoming poisonous themselves to any potential predator.

IMG_0719

milk weed and guest

This is pepper grass. It’s growing out in front of our detached garage. I had to hold my camera down at ground level in order to get a decent picture. The leaves have a peppery taste, and the seeds can be ground and used like black pepper. Green Deane says the roots mixed with vinegar makes a great horseradish substitute. Ed and Bam Bam would love that. Chicken girl and I, not so much. You all know I’m going to have to play with it anyway, right?

0904181038a_resized (1)

pepper  grass growing in the gravel

This stuff is growing everywhere around the house. It’s called Hornbeam Copperleaf, and as of yet, I can find no good use for it. If you do, let me know.

xs_1534532469397_resized

hornbeam copperleaf

These were out in the dog pen. Don’t know enough about fungi to even venture a guess. I did ask about it, and couldn’t get a definitive answer, so we pulled them up and disposed of them. Don’t think the dogs would eat them, but you never know with Meeko. He eats ragweed leaves.

0824181730

Some kind of fungi. Notice the spurge at the bottom of the picture

This is…yes, it’s corn. We didn’t plant it. It’s out where the chicken pen was a few years ago, so we figure those were some seeds the chickens didn’t get. Don’t really expect it to do anything, but we’ll see. Morning glories are coming up around it. Talk about invasive! Morning glories are the worst! Even if they are pretty.

IMG_0699

Corn. See the morning glories kind of circled behind it?

This is called a hummingbird vine. Someone had to have planted it, because it originates in Mexico and South America.  It’s invasive too. It’s pretty, but it’s unruly. Good thing I like the wild look huh. Still if it gets too wild, I’ll have to cut it back.

xs_1536077803919_resized

hummingbird vine

The wild cherries are gone as far as I can tell, but the grapes are hanging in. xs_1534532720530_resized

We have a ton of juniper berries, but still don’t know what to do with them besides making gin and I’m not doing that.

IMG_0720

juniper berries

Of course we still have plantain, dandelion, chicory, mallow, and goldenrod.

0904181037_resized

goldenrod

Remember when we were talking about mint and I said that it’s super invasive and that’s why a lot of people don’t plant it directly in the ground? Well, I guess it doesn’t do well in drought, because I only have about three stalks of mint in my yard and they didn’t get very big. Maybe it will come back now that we have some water.

0904181114_resized

What’s left of my mint.

For the second year in a row, we have a volunteer pumpkin growing under the maple tree in the front yard. It starts so late that it won’t be big enough before it gets cold. At least it wasn’t last year.

0904181036_resized

volunteer pumpkin blooming

Next week, Ed we’ll be back to tell you more about our experience with the wild hive. It was awesome!

Hey, if you like our blog, please share the love with your friends!

Have a great week!

Connie