Vanishing Bees, Constipated Dogs, and Mite Infested Chickens: Reality on the Homestead

I’m pretty sure that after four years of reading our blog (If you’ve managed to hang with us that long), you know that this is not one of those that paint a wonderful, rosy picture of homesteading. We would be lying if we did that, and the Lord frowns on lying (among other things).

So you share in our successes, and more often you share in our failures. We hope you can learn from our mistakes and not make the same ones. If nothing else, it might give you a good laugh.

To us, however, this particular post isn’t funny, but it is an example of how quickly things go can wrong, and how bad they can get if you don’t get ahead of them just as quickly.

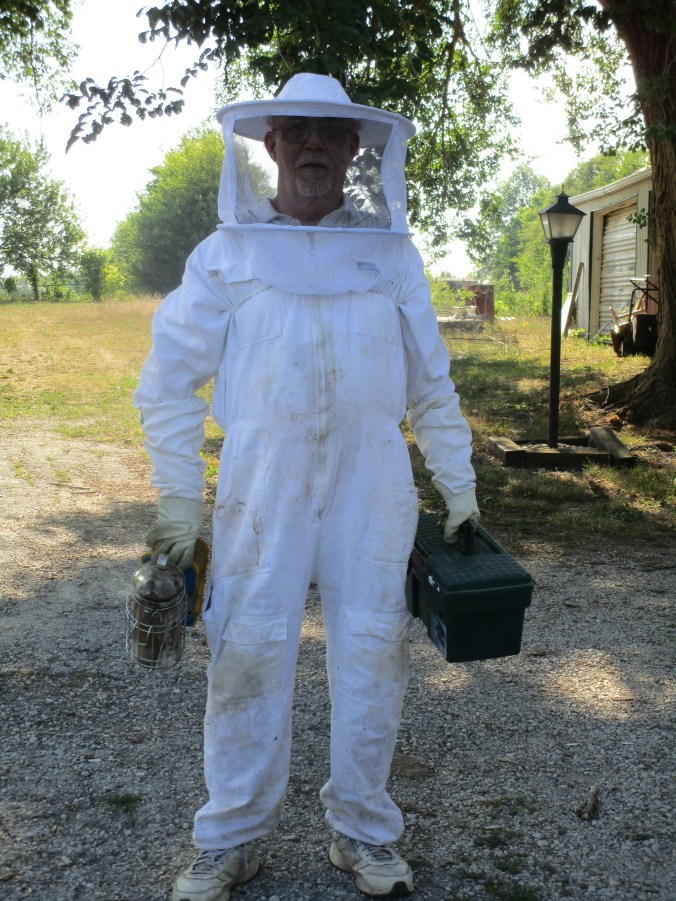
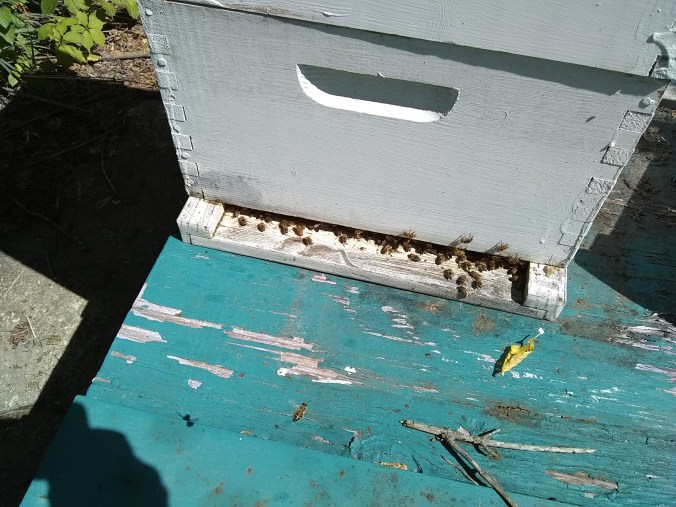
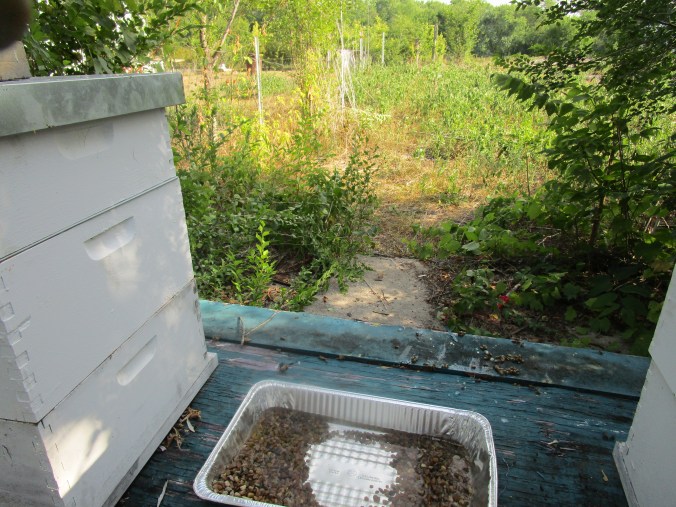
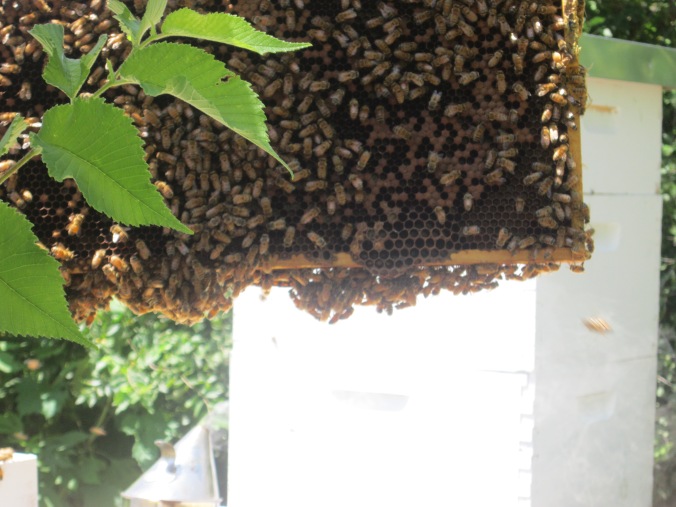
First, a couple weeks ago, Ed went out to set fresh hive beetle traps and check on all the bees. I was working at my computer, and Ed came in and said that two of the hives are gone. At first, I thought he meant they were dead, and my mind raced to figure out how that could have happened so quickly without us noticing something. Then, I realized he meant they were gone, like swarmed, only we really aren’t sure if that is what happened either.  The two hives in question were the ones  sitting closest together: the original hive that we split last summer, and the nuc that we bought last spring. The split hive, sitting out in the pasture, is still intact. I imagine that Ed will want to write about all that, but it may take him a few weeks to process it. It’s hit him pretty hard.

Then, Monday morning, Chicken Girl came back in from letting the chickens out, carrying a hen with her. She said the feathers around her vent were completely gone, and as she turned the hen around to show me, she gasped and said, “She has mites!” (Oh wonderful.) I told her to take the hen out to the garage and I would bring out the diatomaceous earth.

We have had unseasonably cold weather this week. We’ve had temperatures dip down into the single digits and we’ve even had some snow. That is more like late December and January weather for us, not early to mid November. Monday morning, it was cold and snowing. That’s why I told her to go to the garage. It’s not heated, but it would be out of the wind. So we dusted that hen with the DE, and then we examined the other three in that coop. One more had some, but the others didn’t. We treated them anyway. This morning, Chicken Girl told me she thought the mites were gone, but she’s going to keep a better eye on it. The chickens in the little coop were fine, but Chicken Girl is worried about moving them to the big coop once we get it finished.

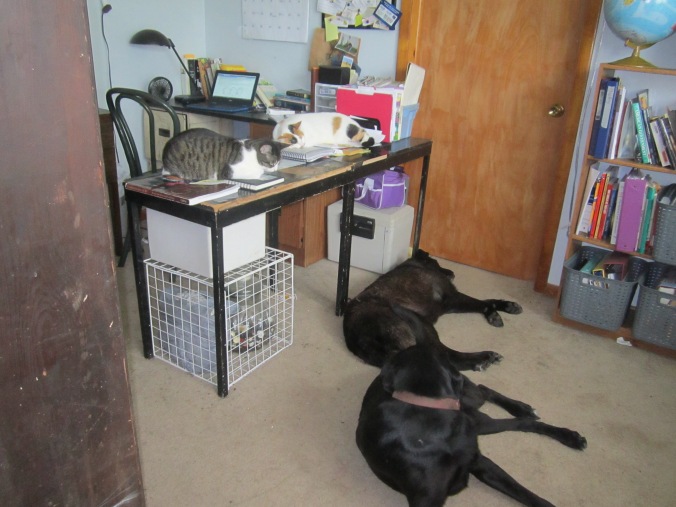
Now, for the true highlight of the month. As you know, we have our big dogs, Meeko and Libby, outside in a large enclosure. You know this because we have written several posts about the seeming impossibility of keeping them in it. Two years ago, we reduced it in size by half, which actually put them farther away from the house. We go out to feed, water, and spend time with them twice a day, and were taking them out for a walk with us about once a week. However, once Bam Bam moved back in with the little dogs, the walks became problematic, and we hadn’t done it in awhile.

Libby has always been rather aloof. She isn’t crazy about being handled unless it’s her idea, and it’s hardly ever her idea. Add that to the fact that Meeko is a big attention hog. Getting past him to get to her is a challenge. OK, it’s nearly impossible without someone else distracting him.

Libby is also one of those dogs that gets a thick, heavy undercoat in the winter, and then spends all of spring and summer getting rid of it. By fall, when it’s time for her to coat back up, she looks semi emaciated, but it’s just that she’s lost all that hair.

Well, A few weeks ago, I noticed that Libby’s winter coat didn’t seem to be coming in. She looked even more thin than usual. She was eating the little bit of canned food we give them every morning (in case we have to sneak some medicine), but it didn’t look like she was eating a lot of dry food. We were trying to watch that anyway because she has worn her teeth down pretty far, and we wanted to make sure she could still eat the dry food. That being said, she was still taking dog biscuits from us and seemed to be chewing those just fine.

I wanted to get my hands on her, so I told Ed to get hold of Meeko. I was shocked. She felt like skin and bones. Later that day, I brought both dogs in the house and started watching what she was doing. I thought she might not be getting enough to eat and gave her a whole can of food, putting her in Ed’s office so that she could eat with out having to fight off the other dogs. She didn’t touch it. That was Thursday afternoon (Nov 1). By Friday, I realized that not only was she not eating, she wasn’t pooping. Thinking I might have to have her put to sleep, I called our regular vet. They were swamped and couldn’t get her in until the following week. I didn’t think she could wait, so I found another vet, and got her in that afternoon.

The diagnosis? She was constipated. No, she was Constipated. Her colon was completely full and it was backed up into her small intestine. She had lost 15 lbs! I don’t need to tell you how we felt, do I? The vet did tell us that her blood work looked great. Other than the obvious problem, she is in good shape.

So the vet gave us laxatives and instructions for the weekend, and told us to call her back on Monday. Since part of the laxative regimen required miralax in her drinking water, we couldn’t let the other dogs get access to it. So we confined Libby to our bedroom. Meeko did not like that at all.

Meeko at the door

Meeko moping outside our bedroom door.

Monday nothing had changed, so we took her back. That was Monday, November 5th. She got to stay with the vet for a week, and we brought her home Monday November 12th. (The same Monday Chicken Girl discovered the mites). We did go visit her on Friday the 9th. They had a cone on her to keep her from pulling the IV port out. They took it off for our visit and told us to watch her because she’s quick (like we don’t know that!).

1109181137a

Visiting Day: She was not happy.

When she came home, she was mostly cleaned out (I won’t give you all the details…yes, thank me), but they want her to stay on all the laxatives until Thursday. Then they will tell us how to start backing them off. The good news is that she obviously feels better, she’s eating and she is no longer constipated. However, thanks to the laxatives, she has no control over her bowels. Oh, and her weight had dropped to 50 lbs for a total loss of 22 lbs!

We cannot put her back outside because one, she has neither fat, nor winter undercoat, and it is cold, and two, we have to watch her to see how things are moving. We can see it alright. We can smell it too. We’ve already given her four showers to help keep her clean (yeah, she loves that), and are in a constant state of washing towels and blankets.

IMG_20181114_095519987

After her bath this morning, she was shivering, so I put a blanket over her. She seemed to like it.

Oh, did I forget to mention the bill? $2365.00! That blew what little budget we had, and we had to remind ourselves that the Lord is our provider. We do the best we can and leave the rest to Him.

Don’t be too surprised if, in the next few months, we write a post about building in new dog pen right off the house, probably utilizing the front door. Also, I imagine Ed will want to tell you about what it was like living with Meeko in the house for a week, without Libby.

However, I think for next week, he might be continuing his series on firearms. He probably needs to get his mind of his missing bees, and cleaning up after a dog with free flowing bowels.

Connie


Fifty/Fifty Making the Split

A short, very simplistic, primer on the life of a bee hive:

Step One: Bees come from somewhere: swarm, bought or split and begin making a hive.

Step Two: Queen does a mating flight and begins making baby bees (called brood) and we hope a whole bunch of them.

Step Three: All the bees work together to fill the hive space with brood and food and lots of bees.

IMG_0658

Not yet ready for splitting but a pretty good example of a healthy hive headed in that direction.

Step Four: Oops we got too many bees.

Step Five: If they have not already bees begin making Queen Cells.

Step Six: New Queen is born, old Queen take about half the hive and moves out, this is called a swarm.

Step Seven: See step one.

And that is how bees increase, ask somebody else about birds.

So today I am going to talk for a little while about how bee keepers control this natural cycle to make certain they keep their bees. It is called Swarm Management and Hive Splitting. The point is to catch the hive somewhere around Step Four and intervene before the Swarm Instinct has taken hold. Then you artificially split the hive so as to make two hives out of it.

We have a hive and man ain’t we proud of it. This hive is strong, well populated, clean and busy as…. well….. bees. You may be weeks or even days from a swarm. Bee hives reproduce themselves by swarming. It is a natural occurrence in a strong hive that is growing. Sooner or later part of the hive will break off, move and reestablish itself as a separate hive. What we want to do is control that instinct by moving them ourselves before the Swarm Instinct kicks in because once the girls start the process they will get it done.

If you want to be technical there are several viable ways to split hives. So far I have tried and succeeded at one way and that is what I am going to talk about. A disclaimer. Succeeded is defined as, they were alive and doing well day before yesterday when I looked. If all my writing on the subject has taught you or me nothing else it is that things can happen very fast in bee world.

If you want more information on Swarm Management and Splitting Hives I suggest you read starting on page 69 in your copy of First Lessons In Beekeeping or check out this.

We had one hive out of two make it through the winter. That was my goal for year one and this was year two. No plan survives initial contact. But I was happy about it and, further, the hive was strong and well populated. In May, after some discussion and research we split the hive. There are other ways and I will probably try a few of them if given an opportunity next spring but here is what we did.

First, we isolated the laying Queen for a little over a week. We did this by putting a Queen Excluder between the two deep hive boxes. It does not really matter whether Her Majesty is working in the top or the bottom box because now we have her where she can only lay in one box. By finding the box with uncapped brood in it we find where the Lady is laying.

queenex

This is a Queen Excluder. Her Highness is bigger than the other bees and this keeps her on one side of the excluder.

When we checked we found two good things, there was uncapped brood in the bottom box which meant she was there, and there were Queen Cells in the top box. Russian bees have a habit of keeping “just in case” queen cells ready. If the queen is still viable she will not let them hatch. If not, or if it is time to swarm, she will. So we took the top box, placed it on a bottom, put a top piece on it, closed the front and we had the start of a new hive.

Next step, we separated the split from the original hive by about four miles. Two would have done nicely but four was the best we could do over two miles. Why two miles? A bee can travel up to a mile an a half from her hive, find something she wants like pollen, water or maybe her old hive, go back to where she came from and communicate these directions to her hive mates. Yeah, me too. That’s amazing. I worked with U. S. Army trained Reconnaissance Scouts who could not tell you the way to the latrine.

So we got the ladies more than two miles away and set them up in a pasture with already blooming clover, plenty of nearby water and other blooming plants all about. Then we waited. The split hive needed to stay away from the original hive at least two weeks. During that time I visited every couple of days and checked the feeders and the general condition of the bees. Both them and the original hive seemed to be doing well.

Lets talk Queens. You can buy a Queen and place her in your split hive. That will cut your delay on getting fresh brood by one to two weeks. What we did was just split them and let nature take its course. Depending on whether you have Queen Cells in your split and what condition they are in the delay to get a new Queen is going to be one to a little over two weeks. Then you have a one week delay while she is bred. Then you have a two week delay until your brood begins to hatch.

That is why it is important to have capped brood in your split and that is why your split will be behind your original hive no matter what you do. We got less than half the honey out of our split as we did the original but they had made and do have plenty for winter.

Oh, an oddity. Russian bees are normally pretty calm and not the least aggressive compared to most bees. For whatever reason these ladies are kind of “‘ttudenal” and will sting you right now. Hopefully they will get over it but I swear they are still mad at me about the split.

Ed

Wild about Wild Bees: Part Two of Three Parts

So the last we spoke, Connie and I were beginning to, for the first time, try to pull wild bees out of the walls of a dilapidated old house that was soon to be torn down. You can find all that here.

The house was lathe and plaster walled and there was no electricity in it. Good luck as much as good planning, my sawzal was battery powered, and yes I had brought extra batteries. But where, exactly are the bees? I had proven that they were as far down the wall as two foot or so from the floor and as far up the wall as at least six feet. What about side to side.

IMG_0491

This is the wall I will be working with. In the video you will see a two foot wide swath cut out from floor to ceiling and all of it full of hive.

As we faced the wall, to the left was limited by the window sill and the necessary framing that would go with it. From prior experience, I knew most houses were framed at two feet on center. Experimentally I went looking for some framing at two feet from the window and found a two by four there.

Now I had a box that went from at least the ceiling to the floor and was two feet wide. That seemed like a natural place to find the hive so, between the two foot up and six feet up, I made a cut just inside and searching for the framing two by four. Once I found it I cut open a small area.

That was when I began to get a hint of how amazed I was about to be. I took my small pry bar and a hammer and began to pull back the lathe and plaster wall. There was no need to be overly neat because they were going to tear the house down anyway. First I went up from the two foot mark to the six foot.

Between the two by fours spaced two feet on center packed as deep as it could go and all of the four feet length there was hive. That would be about twenty inches wide and four inches deep by four feet long or about two and a quarter cubic feet of hive and brood just covered with bees.

That would be the ones that were not on me.

And that as not all of it. Over a period of time we uncovered up closer to the ceiling and  from the two foot point to about a foot under the floor. All of it was filled with hive starting with the oldest near the entrance hole and the newest nearer the ceiling. Here, let me see if I can show you:

I have a reaction when I come into close contact with God’s magnificent engineering and actions in nature or in man. First I am awed of course. Next I am strangely happy, almost childishly so. Some kind of “I just knew you were there God.” moment. Then I am simply humbled by the works of God. Add to that the fact that we were hopelessly over matched today.

So when you cannot do it all you do the best you can. Finding the Queen by any normal means would have be pretty near impossible, most of the comb was empty because it was early spring and there was very little honey.

Connie and I decided to get all the brood comb we could find and put that in the hive box which we had brought. Suddenly the bees began to quit attacking us and settled back into the comb with some coming and voluntarily landing in the box. We gathered as much as we could, sealed the box and put it in the truck.

Nine countable stings and one box of bees with way too many left behind, we were on the way home. Already we, both of us being veterans, were A. A. R’ing the whole thing. (After Action Reviewing). As we rode home and drank water. We both agreed we would do better next time.

In part three I will talk about our AAR and the ultimate outcome of our first attempt. If any apiarist who have something add reads this, please feel free to critique me in comments. I have had my faults explained to me by Drill Sergeants, you will not hurt my feelings and you may help me and the bees next time.


Minding Your Own Beesness

IMG_0663

Me in my bee suit with some of my tools. Nothing major happening, just visiting the girls and checking conditions.

Start with this simple fact. If you buy a nucleus of bees and the necessary hive equipment, you are going to be out around three hundred and fifty bucks. Ouch right? This being my third year working with bees I have put out, just for start up equipment, about nine hundred bucks.

You can purchase boxes of bees, I discussed what all that means in another post, and that will save you plus or minus seventy-five bucks a hive. The down side to boxes is that they do not provide an active “mini-hive” like the nucleus does, so it takes longer for your hive to get grounded, start producing brood and honey, and get stronger.

IMG_2032

This is a box of bees.

0501161325a

This is a nucleus of bees. Called a nuc.

Buying your way to an apiary is expensive, so what can you do about that? Basically there are three strategies to grow your apiary without have to sell the children to the circus. They are as follows:

Split Hives: Take a strong over populated hive, catch it before it begins to swarm and split it in half.

Trap Bees: Set out your basic bee traps and capture bees who are swarming.

Remove bees for others: People often have trouble with bees, but these days are more aware of the declining bee population. So, rather than kill them, they want people to come take them away.

This year so far, I have been involved in two out of three of these methods with mixed success. Over my next three posts, I will talk about all three, starting with taking out a hive at someone’s request.  Then I’ll talk about splitting, and finally, the one I haven’t done yet but want to very much: trapping swarms.

First allow me to update you about the general condition of the bees. We started the spring with one hive that had made it through the winter. No one was more surprised or happy than me. After losing both hives to beetles the year before,, and one hive to unknown causes during the winter, one success was just wonderful.

IMG_0658

This is a look at the bottom deep (there are two) in my newest hive. The deeps are where the Queen lays the brood and where the bees put their honey. The supers, smaller boxes, are for our honey.  Note the little plastic thingy upper right as you look at it. That is a beetle trap. So far no problems but you are going to see lots of beetle traps in my hives.

I ordered one more nucleus of Russian Bees during the spring. During the summer, the surviving hive was split. We also gained a hive though taking bees out of a house. I will talk about splitting and pulling out bees in the next two posts.

IMG_20180720_105618698

About 2:00 PM: even the busy bees are lazy on days this hot.

IMG_0662

Not a great picture but an improntu waterer. Experience has taught me you have to have some place for the bees to land because bees are not great swimmers. I have learned since this, that you really need to move it a little further from the hives, because bees do not forage right outside their door.

This summer has been very hot and dry. I am at the point where I am going to be putting out water for the bees. Today we are over 90 degrees and, as you can see by these pictures, nobody wants to go outside. Not the bees and not me. Maybe as it cools off.


IMG_0657

Hard working ladies and pretty honey. But this is all theirs.

But I looked late last week and everybody was fat and sassy, with some of the prettiest honey I have ever seen. I will check them tomorrow morning, and see how that is going. When I post another in this series, it will be about pulling bees out of places for other people, and trying to start a hive or hives from them.
This was my first try at that so I will be able to tell you about all kinds of things I did wrong, and hopefully you can avoid my mistakes.

Ed


BEEginning Again Part 2

IMG_2032

This is a packet of bees.

So, as a complete update, I have my two hives installed. One is doing better than the other but they are both coming along with capped brood and honey present in both hives.

This time I decided, since I had all the equipment, to buy packages of bees rather than nucs. Nucs are basically a mini hive with five frames of honey and brood, bees and an active queen. Packages are simply the bees and the queen. Unlike the nuc, the package’s queen and her new subjects are not formally introduced yet, and this can cause you some problems.  The queen and her retinue come in a separate container.

IMG_2030

A queen container with queen and her attendants.

So we rode over to Chillicothe, Missouri to see Bill and Tammie and pick up our bees. We decided to go in the car and we loaded two packages of bees in the back seat. Would you like to know what will make you a defensive driver? Knowing that, if you break those boxes, you are going to get REALLY busy.

Arriving home we pulled the bees out and looked at them. Here is a look at one of the boxes as seen from above where you take the bees out of.

IMG_2036

Top view of the bee packet.

So here is the trick, I need to get all those bees, the queen and her attendants in a hive without causing major disruption, losing bees (especially the queen) or getting stung.

Step one, the queen: The queen in her little container, is supposed to hang down between the middle frames. There is “queen candy” in one end, which she and her attendants are supposed to eat out, and then the queen should emerge to a grand meeting by her new subjects. Hopefully.

An alternative method is to tape up this hole and hand release the queen about five days after you set up the new hive. I decided, on good advice, to try that. I will tell you the outcome later.

Next, I set up the lower hive bodies and got the hanging feeders ready. We used 4 lbs of sugar to 1 gallon of water. This is the mixture that best stimulates comb making.

IMG_2038

The black thing with two holes in it to the right of the picture is a feeder.

So I set up the two lower hive bodies as shown in the picture above. Please note, almost dead center between the third and fourth frame counting from the left the plastic queen container. They either love her or hate her, hard to say. To that I added another empty hive body. Shaking bees into a hive body is not as easy as it may at first seem and it never sounded that easy to me in the first place. I try to treat the girls like ladies you know.

So I took some advice from Bill George and set them up like this:

IMG_2037

Bee packet upside down over frames.

This allows the bees, who now have food and water available, to crawl out on their on. Thee days later I opened the hive, took out the box and the vast majority of the bees were enjoying their new home.

The queen? I went back a couple days later to free the lady and to put one more set of beetle traps into each hive. When I checked on the queen containers in both cases the bees had already freed the queens. I found the tape lying on the screened hive bottoms when I moved the hive bodies to clean out and put in these traps. Apparently duct tape is not all its cracked up to be, or bees are smarter than we give them credit for.

A tip based on my lessons learned here. When you are only using a small number of frames in a hive box make CERTAIN they are close together. If not you end up with a situation like this:

007

Frames too far apart.

The bees have built comb out attaching the two frames together. I lost some brood because of this and I am jealous of my baby bees.

So I checked them again yesterday and the bees are still great. As I said, one hive is behind some but is still doing well. I enjoy fooling with bees and taking care of them, but that isn’t all I have been doing.

New dog runs and new chicken coops have been happening. I will talk about them later.

BEEginning Again

Those who follow my writing know that I started an experiment with bees last year. I invested in two nuclei (nucs), or two mini-hives with a queen, the bees, some honey and some brood (eggs for worker bees). Along with that I bought all the necessary bee keeping equipment.

I considered success getting through the first winter with one active hive. I did not do that. Luckily for this project, I consider failure quitting. I have not quit. With what honey I sold already, I can cover a lot of the cost of replacing the bees, so this was not quite the failure it could have been and I still have a few quarts of honey left.

So let’s redefine success. I have all the equipment I need and I have considerable more knowledge of bee keeping. I have two packages of bees on order, and I have my copy of First Lessons in Beekeeping. Along with that, I have made contact with other local bee keepers. I am well ahead of where I was last year.

  1. A hive beetle.
  2. A healthy hive.
  3. After a hive beetle attack
  4. Dead bees on bottom board.

So what do I have to do now? First, I need to clean up all my equipment. I would have had to do that anyway. Then I need to look at my set up. The table I had my hives on is too high. This year I will buy some concrete blocks and set the hives up on them.

IMG_1616

When you realize that I am going to have to put at least one more Super on this set up then you can see that it is too high to begin with.

The hives were on a table which sat on a concrete slab that once was the floor of a kennel I tore out. I need to clean that off and perhaps patch it a bit. I need to buy a couple more things like some more beetle traps, a queen excluder, a bee suit for my wife and/or visitors, a couple more deep supers and a couple of shallow supers.

Yeah, I know. Its like a whole new language isn’t it? When I first started attending beekeeping meetings, reading books, and watching videos, jargon that I did not understand kept washing over me, leaving me as confused as a dog at a whistling contest. If you are interested, you will read books, check web sites and just stop people who are talking about supers and bottom boards and what all, and ask them, “What does that mean?” Most will answer willingly.

As I continue with each post, I will publish a list of bee related terms and what they mean. You are welcome to steal it. I probably did.

Ed

Apiary: A site of one or more managed bee hives.

Bee Brush: A soft brush used for swiping bees off a surface.

Bottom Board: Floor of a bee hive

Brood: Describes all immature phases of the bee: egg, larvae, prepupae, or pupae

Super: General term for boxes (9-1/2-, 6-5/8- or 5-3/8- inches tall) comprising a beehive. Term is more appropriately reserved for honey production boxes placed above the brood nest.

Damage Control and Starting Over

That is how I would describe the last few months on the homestead. Kind of like one step forward and 250 steps back.

When we first started this blog, our thought was to chronicle our journey into homesteading while we deal with the challenges of getting older, as well as dealing with a teenager who has challenges of her own. The challenges seem to have taken over, and there hasn’t been much growth on the homestead. That includes keeping up the blog, and for that, we apologize.

When I started to write this post, I had to look over the pictures I did manage to take over the last four months to give me some perspective and see that there was some progress, albeit not nearly as much as I would have liked.

I’ve been scooter and crutch free since the end of October, but I still have a lot of pain and stiffness. I don’t have much stamina and tire easily. The doctor said it could be six months total before I am completely healed, so we are looking at another six weeks or so. The Lord must really think I need to work on my patience!

Ed’s work schedule leaves him unavailable four days a week, with the other three days for trying to catch up. It’s not working out all that great, especially since he has to spend at least part of the time finding and fixing the new dog escape route. That deserves its own blog post, but let’s just say that Meeko meets us at the back door nearly every morning now. Libby has got out several times too, but she insists on digging her way out and Meeko just finds new places to go over. Apparently, he has forgotten that is how he dislocated his hip last winter.

The garden was mostly a bust; and what wasn’t, mostly rotted on the vine. We did collect a few tomatoes, and I did manage to make some bread and butter pickles from the over sized cucumbers. I found the recipe here (You have to scroll down the page a little to get to the recipe). They were really good, and I am not a big fan of bread and butter pickles.

img_1770

Romas

img_1769

Lost in the jungle!

img_1725

Finished Pickles

img_1755

I know it’s hard to tell, but this is basil. I hope I get some volunteer next year.

img_1756

Awesome Elephant Ears. I think I was supposed to dig them up before it froze. Too late now.

The first week that I was able to get about without the crutches, I decided that Kat and I would harvest the sunflower seeds The same day Ed decided to start clearing the fence row between the yard and front pasture. We both worked about two hours and I pretty much wiped myself out. From Ed’s side of it, when he quit for the day, there was a spot where you could actually tell there is a pasture on the other side of the fence.

img_1762

Sunflowers off the front porch

img_1788

Sunflower heads

img_1791

Seeds and Chaff

img_1789

Ed in the fence row

The okra continued to grow into November. We had a super mild fall and only recently have had freezing temperatures. I decided to just let it dry on the vine in hopes of collecting seeds and using the dried pods for art projects…They are still out there.

img_1758

Okra “Fingers”

We collected quite a bit of honey, and even sold some locally, but then the hives were infested with hive beetles and the bees died. So, we are working on cleaning up the hives in hopes of getting new bees in the spring.

img_1801

Dead bees on the hive bottom

A few weeks ago, Ed, James, and Kat, built the new chicken coop. We officially have three roosters and two hens. The jury was out on Hoppy’s gender for quite a while, but his crowing made it official. Since we discovered that a single rooster’s amorous tendencies are more than one hen should handle, we decided to separate the girls from the boys, by building a split coop. The plan was to run fencing between the two sides, but the weather caught up with us. The first night the roosters all stayed in the same coop, Sunny attacked Moony and Hoppy. There was a LOT of blood. So now,  Sunny stays in “time out” in the old coop, while everyone else seems to be getting along fine, at present, in the new one. Yes, we know we still have one rooster too many with the hens, and that really, there needs to be more hens for the one rooster. We’re working on that. The girls, particularly Scarlet, did start laying eggs this fall, but they have stopped now. We got a couple dozen fresh eggs anyway.

coop-in-progress

The New Coop. Notice there are two drop down doors. Only one is open.

shingles-on-chicken-coop

Shingles we found in the garage when we moved in. Just right for the chicken coop!

img_1752

Hoppy the Rooster

img_1749

Eggs!

So what else happened since July? In August, James had a relapse of sorts and is back on probation. Bam Bam got married in September. I turned 53 in October and Ed turned 66 last week. James and I have both had to deal with some Bi Polar issues and we’ve all dealt with a stomach bug that cost Ed a week’s work. That, of course, caused us some financial strain, but the Lord took care of us, just like He always does.

On a positive note, school is going pretty well this year. We finished a study of ancient Greece and have moved on to Rome. In American History we are finishing up the “Gilded Age”(1877-1912ish) and have formed strong opinions about Herman Melville’s writing.  Have you ever actually read Moby Dick?  Now, only morbid curiosity makes us keep reading.

Katherine has discovered a handicraft that actually sparks her interest: candle making! We did manage to get some bee’s wax, so we will be playing with some of that.

Although I plan to get back to consistent posting, I’m not sure if I’ll be able to keep up with it until after the holidays. If I can’t, Ed and I  both want to wish everyone a Merry Christmas and Blessed New Year.

Connie


An Interesting Week

Last week, we were feeling a little bit of a financial pinch, and I really didn’t want to spend anything more than I absolutely had to. Well, we ran out of dish soap, and were on our way to being out of laundry soap. I didn’t want to use what little cash I had for that, in case we needed something really important, like feminine hygiene products or toilet paper. I draw the line at DIY’ing either of those!

I had, however, made laundry soap before with limited success, so I googled a recipe for that  and one for dish soap. I had everything I needed in one form or another, except for washing soda. I did have baking soda though, and I knew I had read somewhere that you could change one to the other, so I went back to Google.

Once I found what I needed, I decided to sneak in a chemistry lesson, so I told Kat to look up the difference between baking and washing soda, as well as how to change one to the other. Surprisingly, she did it without complaining.

Making washing soda is easy. You can learn how here. Basically, all you do is bake baking soda in the oven for about 30 minutes at 400 degrees. There is a slight change in color and a definite change in texture.

IMG_1656

Fresh baked washing soda

Then we used the newly formed washing soda in the recipes we found for laundry and dish soap. The dish soap recipe that I used did not work out well for me, so I will keep experimenting in that department and let you know what I find out.

The laundry soap, on the other hand, turned out great, and seems to work pretty well. I have not used it on Ed’s uniforms yet, but it did fine with the rest of the laundry. You can find the recipe here.  You grate soap (I used Ivory), and then mix it with Borax and washing soda, and put in the food processor until its a fine powder. I used about 2 tablespoons per load. It’s a lot easier and a lot less mess than trying to make liquid laundry soap.

IMG_1657

grated soap

IMG_1659

Before processing

IMG_1660

After. Notice the layer of dust. We let that settle for awhile before we opened it. Don’t need to breath soap dust.

Over the weekend, the dogs decided they would start playing “find the hole under the fence” again, giving Ed fits for about three days. Since they haven’t got out since Tuesday, I think he solved the problem.  He is still working on new living arrangements for the chickens, but I’ll let him tell you about that.

IMG_1670

Hanging out in the house while Ed fixes the fence . Notice the cats on the table above. Bookworm is annoyed, but think Captain is asleep

During all that, I discovered what I thought might be a spider bite on my back between my shoulder blades. I couldn’t see it with out mirror and I certainly couldn’t reach it. I enlisted Ed and Kat’s help for a few days, but finally gave in an went to the doctor on Monday. It’s an abscess..We don’t know how, and we don’t know why. She gave me a shot in the rear, put me on antibiotics, and told me to come back Wednesday.

On Tuesday, Ed planned to check the bee hives. He hadn’t had a chance to take a good look at them in about ten days, so he was kind of anxious to  check on them. When he went out just to look, the saw this.

IMG_1669

A ball of bees under the pallet the hive sits on. The usually don’t do that.

Then he came back in and called our friends at Crooked Hill. Tammie told him he needed to see what was going on inside the hive, which is what he already planned to do. So he donned his bee suit,  started his smoker and went to visit the bees. As I usually do, I went too, staying on the far side of the fence. From there, I can usually get pretty good pictures and stay off the bee’s radar. I said usually.

Since the Sparta hive had the strange activity, he started there first. All I can say is wow! The hive is crammed full of bees, brood, and honey!

IMG_1687

One frame from Sparta hive

Even with the smoke, they seemed especially agitated, and when I realized I was starting to get some attention, I walked away. When I got back to the chicken pens, they left me. A few minutes later, Ed walked over to the fence and asked me to bring him the camera. Big mistake. Suddenly I had a lot of bee attention. As I started moving away again I felt the first sting on my face, and knew I might be in trouble.  There is a an old metal washtub sitting out there near the black berries, and it was half full of rain water. I had noticed it earlier and decided that might be my best chance of freeing myself from the bees. I hit the ground and dunked my head in the tub, using my hands to splash water up on myself. Once I was pretty sure, was free of them, I went to the house and told Kat to get the plantain oil we made last fall. I know I had at least five stings. One on my face, two on my head and two (maybe three) on my arm. Ed came in a few minutes later to check on me. He got stung three times through the bee suit, but he doesn’t have the reaction I do to things like that. The plantain oil did it’s job, but I took some allergy medicine just in case.

The stings on my face and head swelled a little, but were nearly gone in a few hours. The ones on my head hurt the worst, but I think that was because they were right underneath where my glasses rest. The area on my arm got red and hot. You should have seen my doctor’s face when I went back to see her about the abscess and she saw my arm. Poor woman. She offered to give me a shot for that too, but I told her I thought I was ok. The abscess is nearly  gone.

Today, I had my pre-op appointment for my foot surgery next week. It will be an outpatient procedure so I’ll get to come home the same day. Ed’s kind of stressing about how he’s going to get me out of the car and into the house, but I think it will be fine. We went ahead and rented the knee scooter, so I could practice with it. I think I’ll be ok.

I told you it was an interesting week.

Things have calmed down a little now, although Ed is making plans for harvesting some honey. I’m sure he’ll be posting all about that next week.

Connie